Transform Data with AWS Glue Studio (graphical interface)
Transform Data with AWS Glue Studio (graphical interface)
Transform Data with AWS Glue Studio
AWS Glue Studio is a new graphical interface that makes it easy to create, run, and monitor data extract, transform, and load (ETL) jobs in AWS Glue. You can visualize data transformations and run them on the AWS Glue serverless ETL engine based on Apache Spark.
In this exercise, we will perform an ETL process similar to Data Transformation with AWS Glue (interactive session).
But this time we’ll take advantage of the intuitive graphical interface in AWS Glue Studio!
Use AWS Glue Data Studio, a graphical interface that makes it easy to create, run, and monitor data extract, transform, and load (ETL) jobs in AWS Glue.
- Go to the Glue Studio Control Panel.
- Click on the hamburger icon on the left to expand the menu.
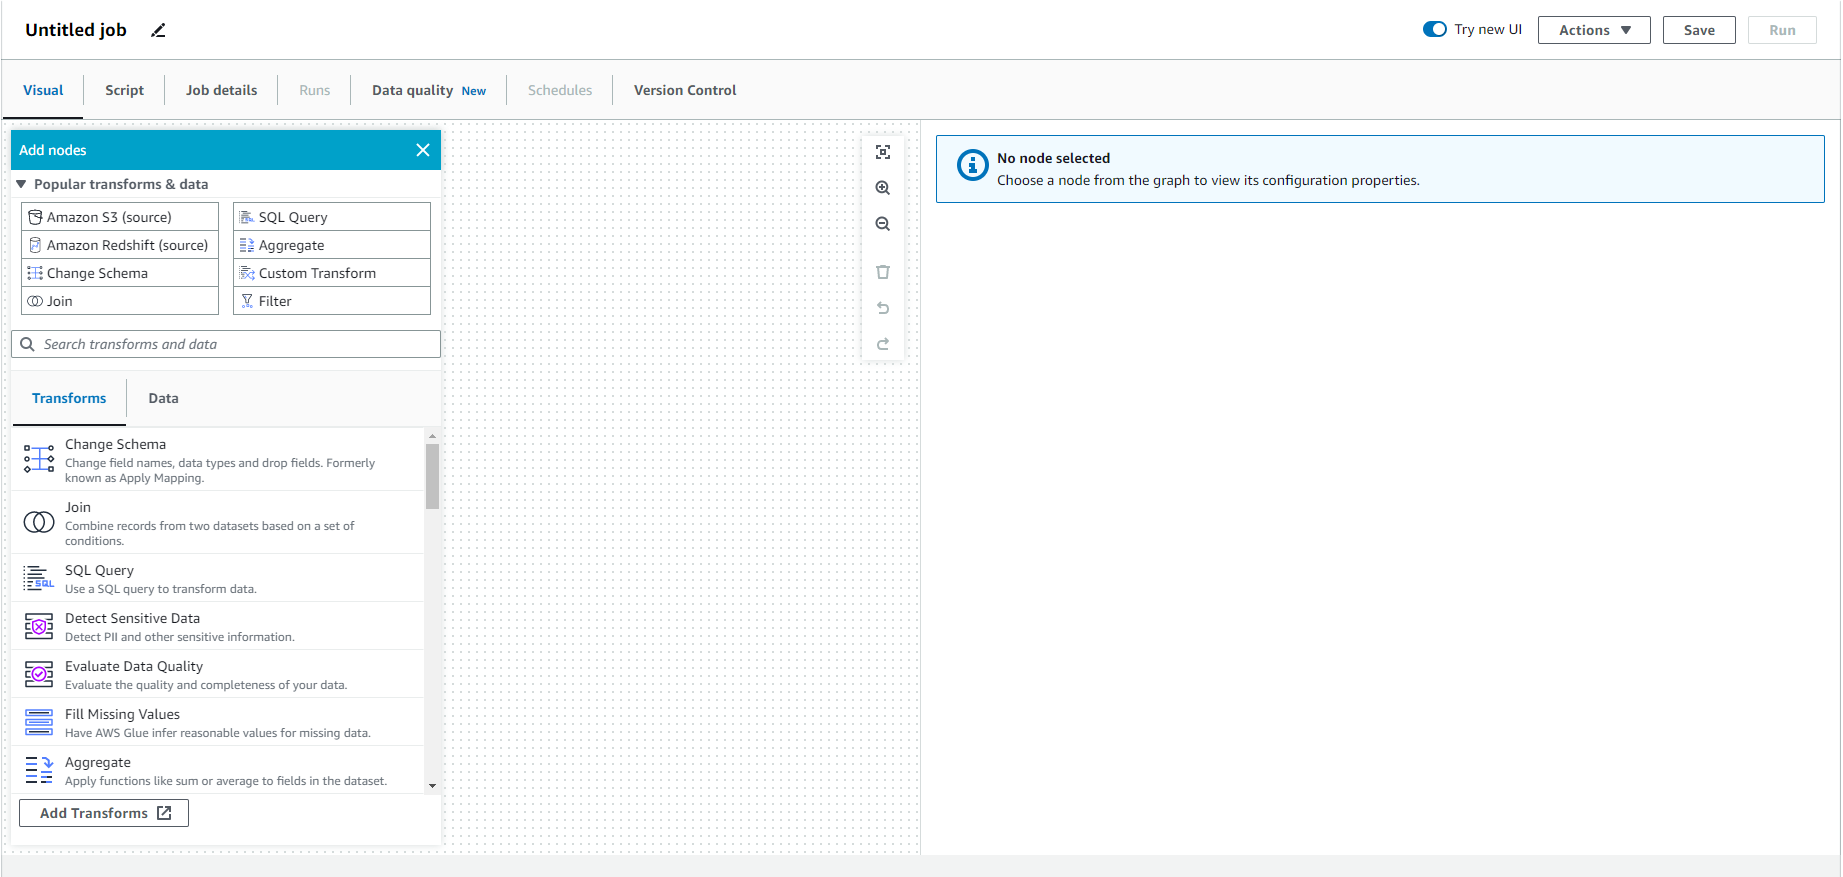
- Click - Jobs and select Visual with a blank canvas
- Click Create

- Click - Source and select - S3
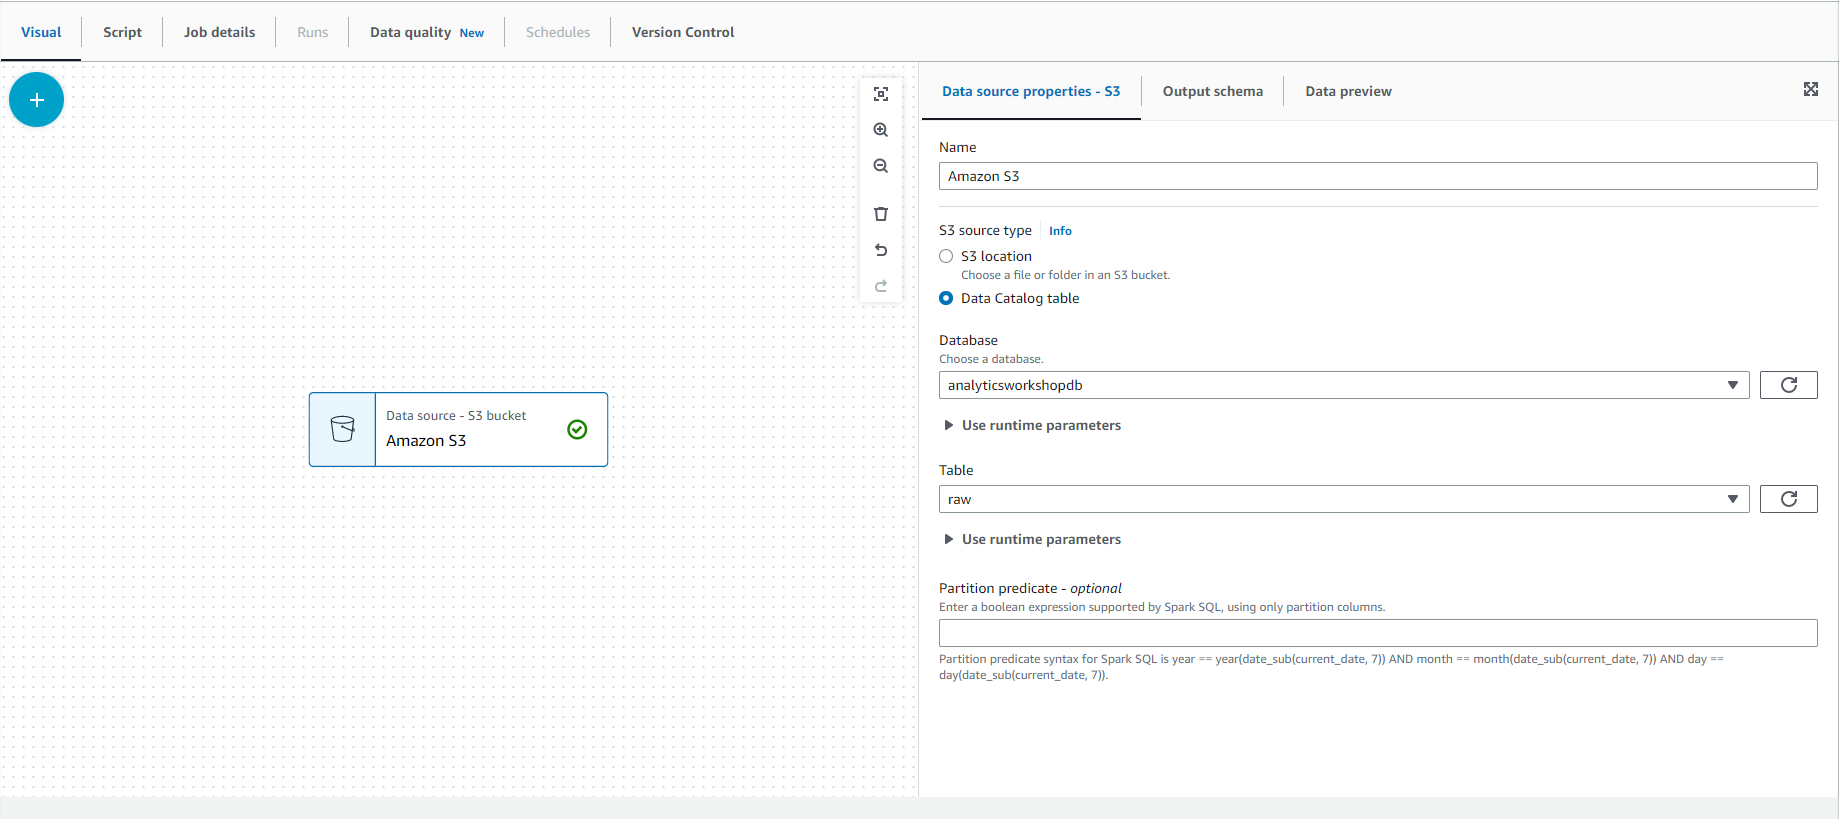
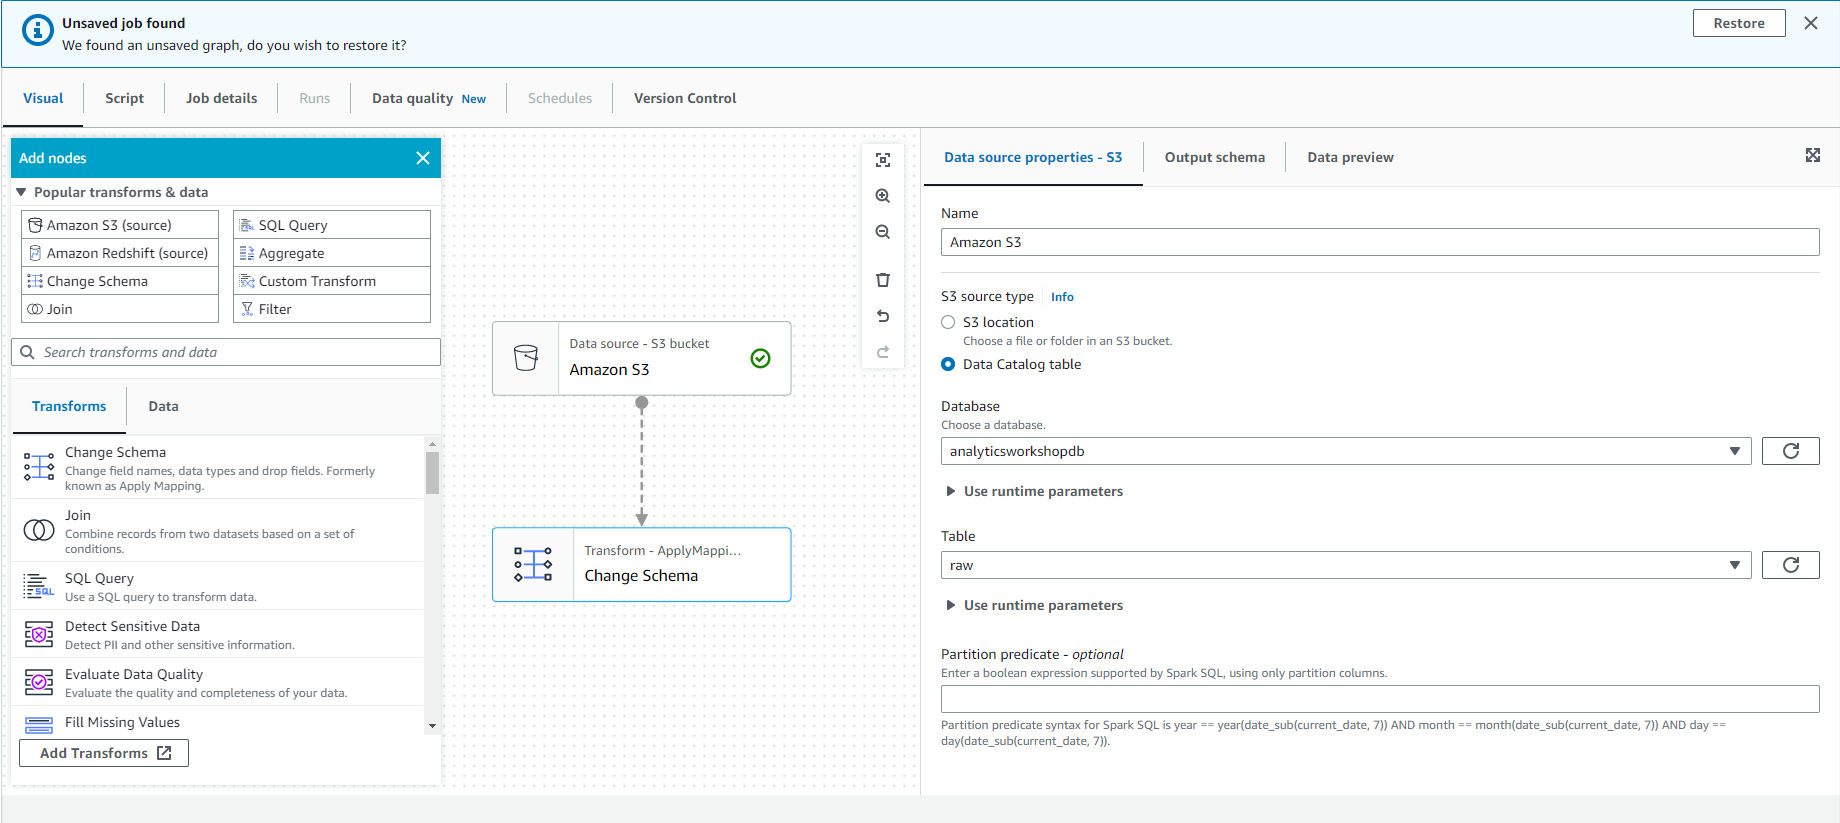
- Select the tab “Data source properties - S3” in the configuration window on the right side of the screen.
- Under the Source S3 category, select “Data Catalog Table”.
- Select the following values:
- Database - analyticsworkshopdb
- Table - raw
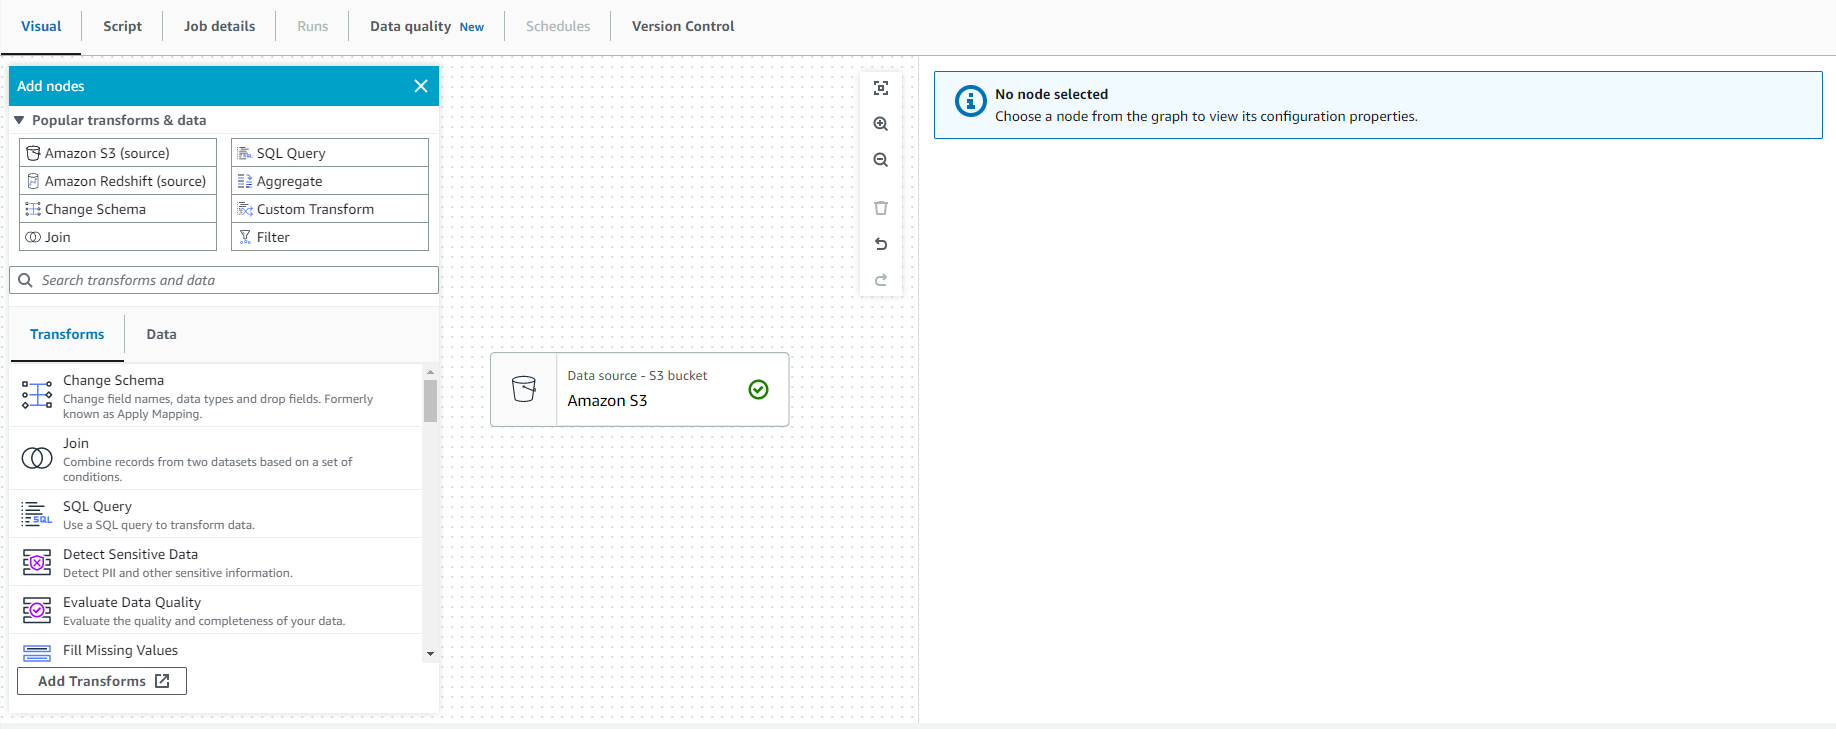
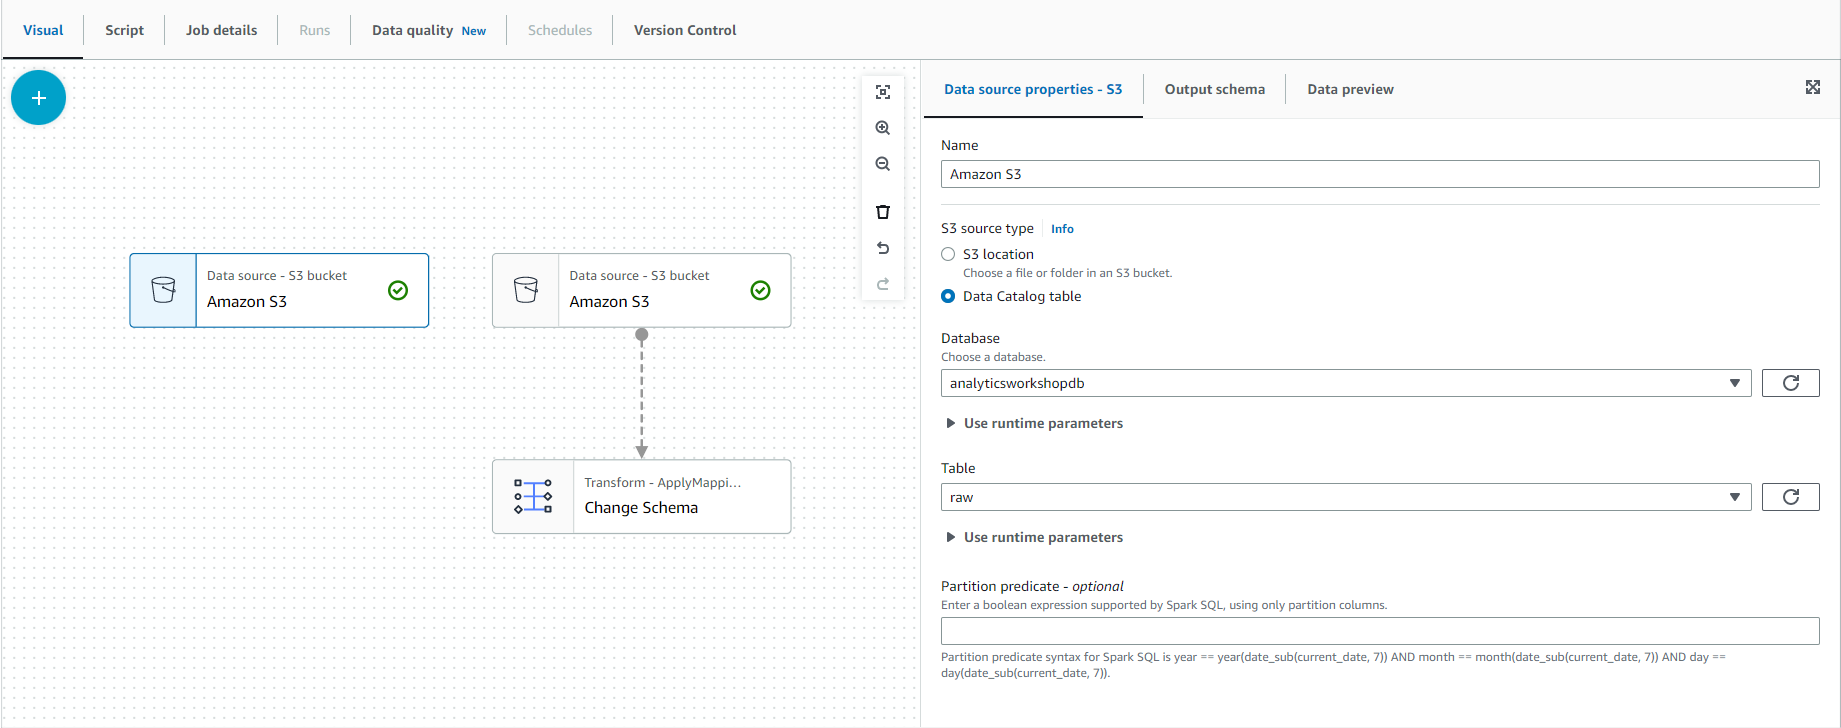
- Now we will repeat the same steps to add reference_data from S3. Select the mouse on - Source and select - S3.

- Select the “Data source properties - S3” tab in the configuration window on the right side of the screen.
- Under the S3 source type, select “Data Catalog table”.
- Select the following values:
- Database: analyticsworkshopdb
- Table (Table): reference_data
- Select the previously added S3 node on the artboard, then Select Action and select Change Schema.
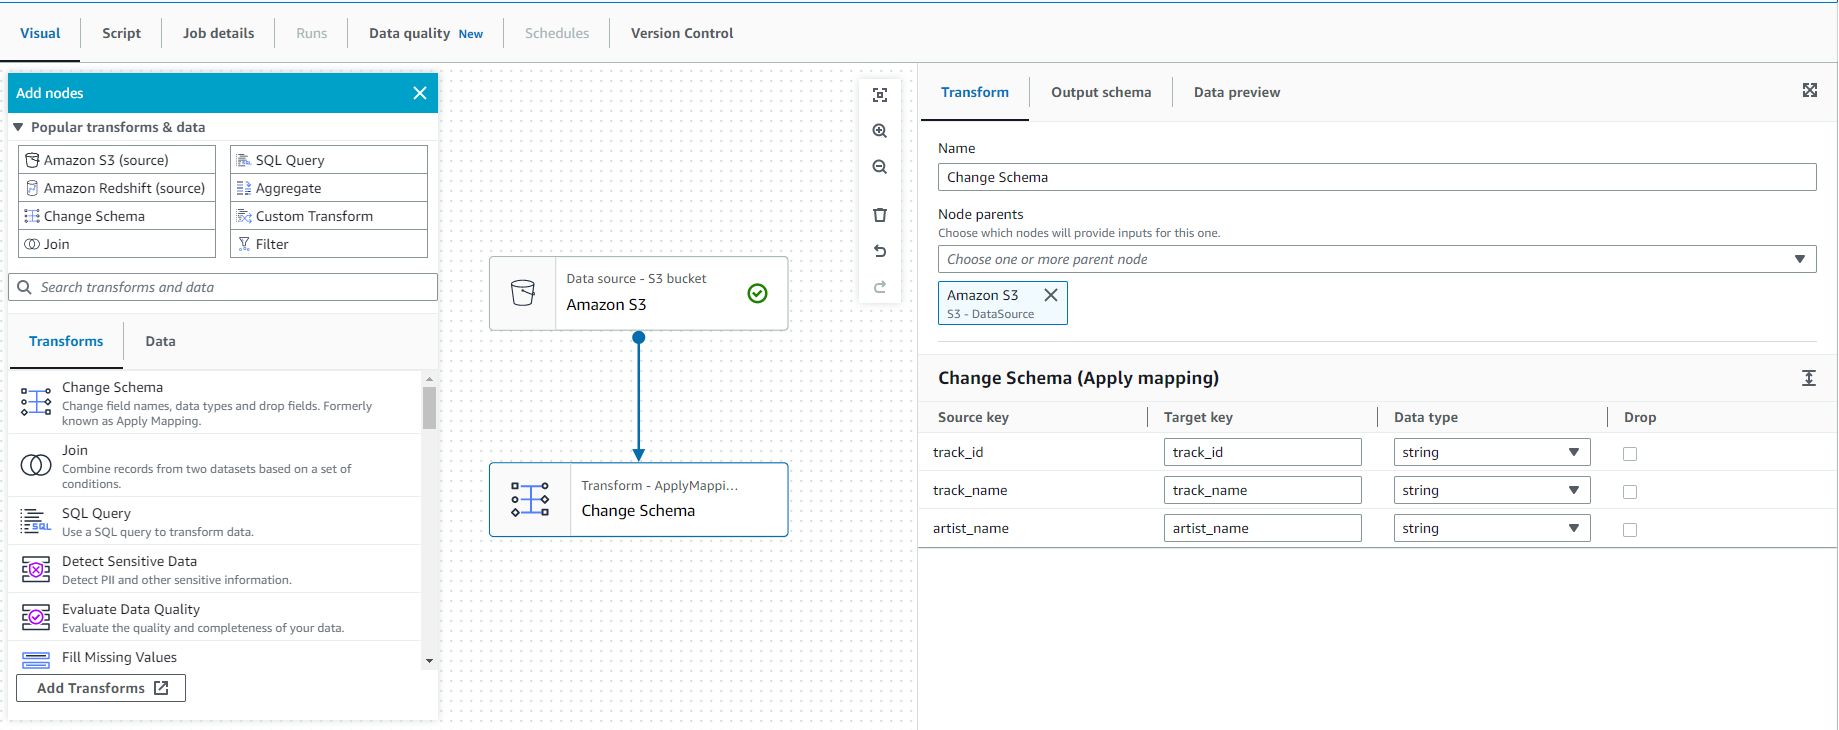
- Select the “Transform” tab on the right side and change the data type of “track_id” to integer type.
- Select the left S3 button on the artboard.
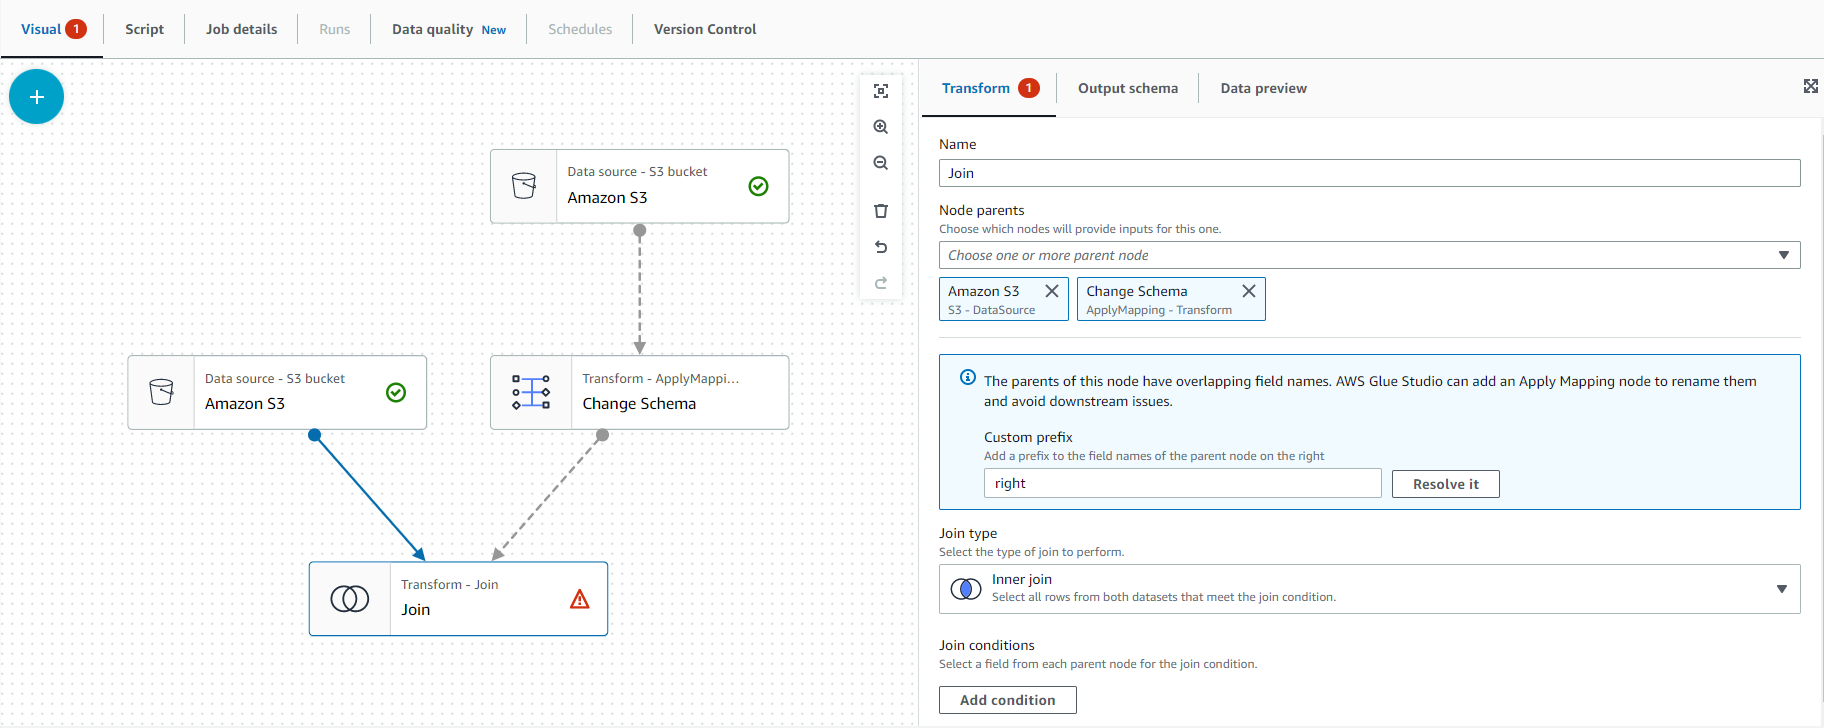
- Click Action and choose Join
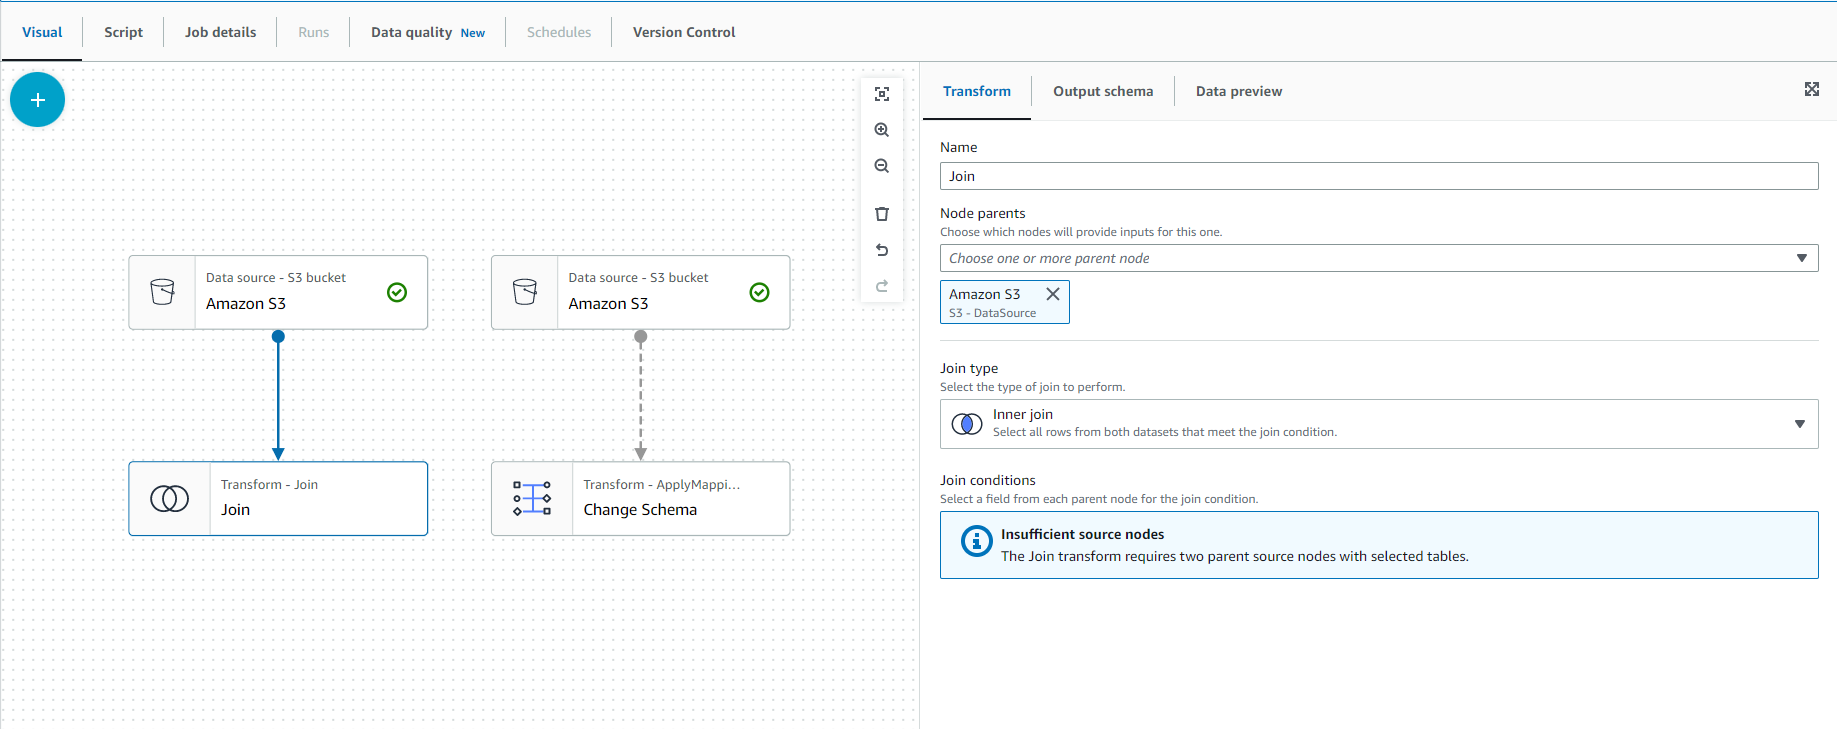
- You should have an image graph like in the screenshot below and the right message “Insufficient source nodes” because you need another node (Data source) to connect.
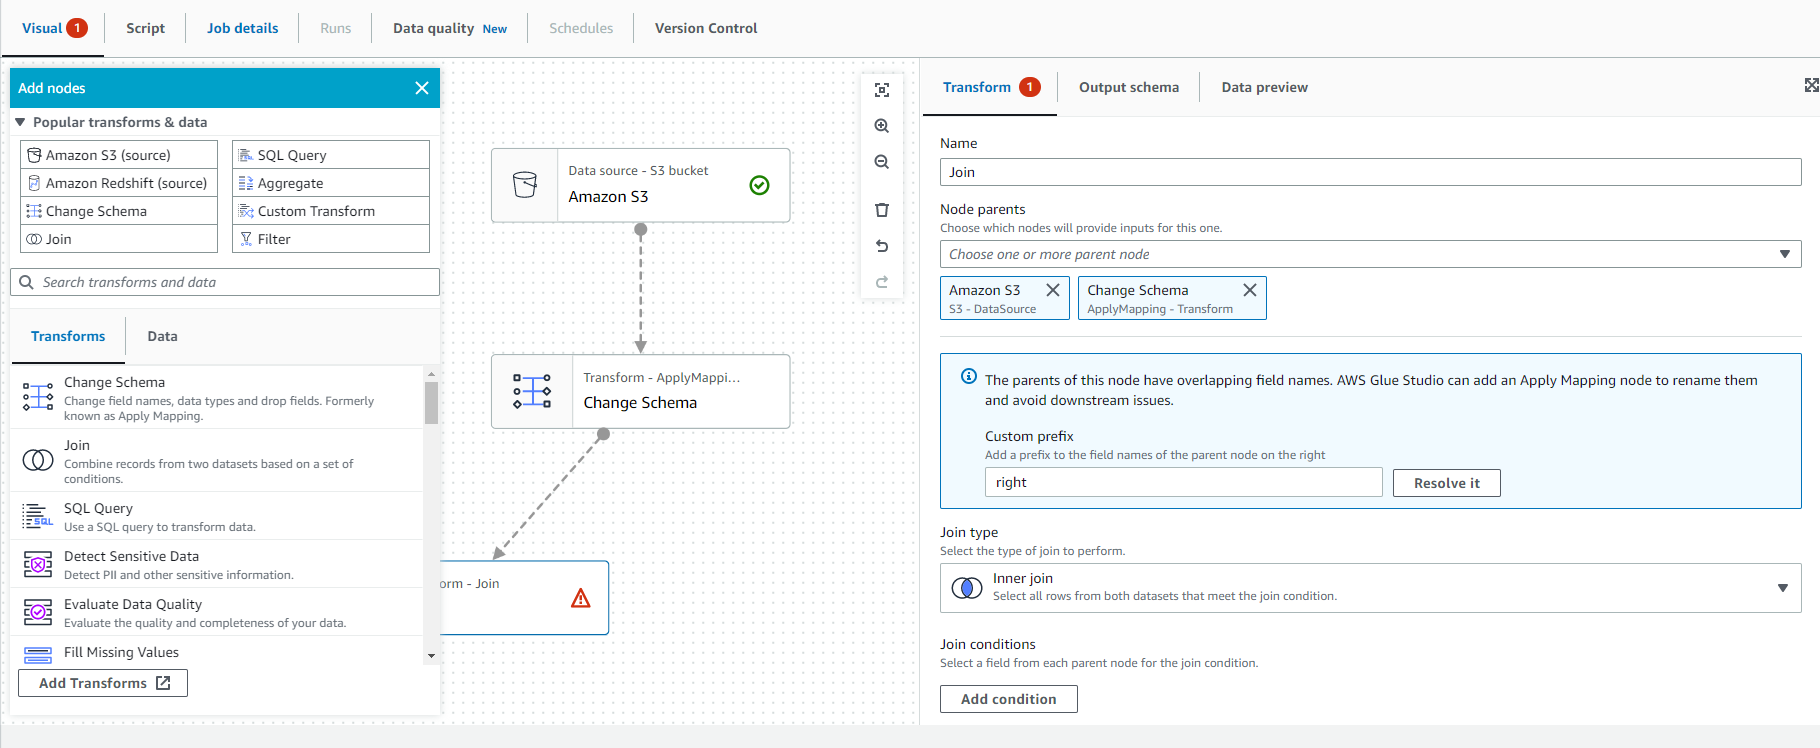
Next, Select on Transform - Join node and on the right configuration window of Node properties select the drop down list and select Change Schema under Tramsforms section as described in below screenshot:
- Select the “Transform” tab with the “Join Node” button selected on the artboard.
-
Select “Add condition”.
-
Select “track_id” column as compound column as shown in below screenshot.
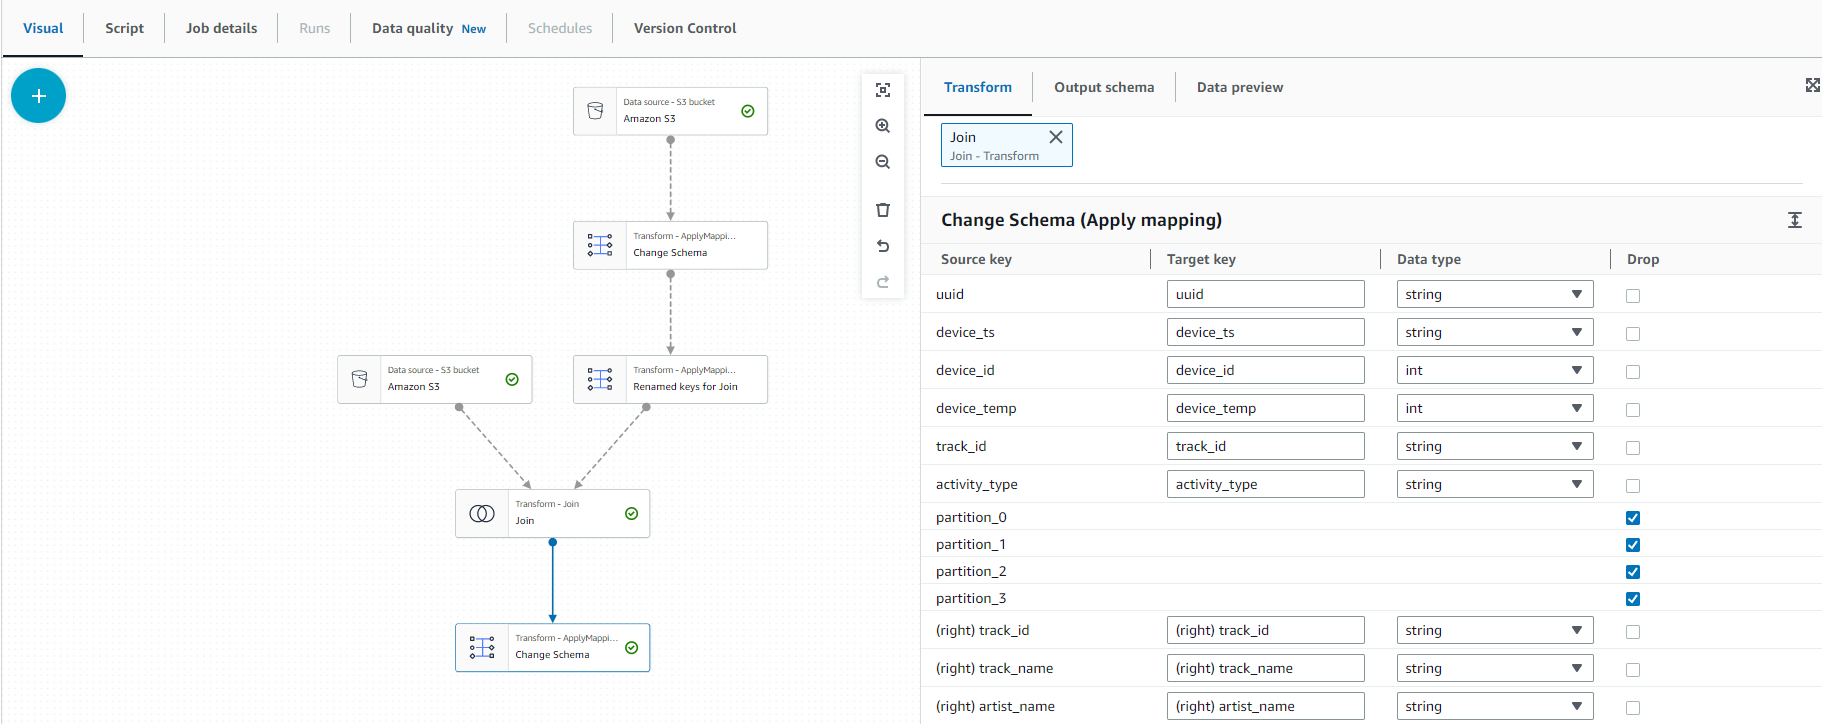
- Once the “Join” button is selected on the artboard, Select “Action” and select “Change Schema”.
- You should get the image diagram as shown in the screenshot below.
- We will delete unused columns and map new data types for the following columns:
- drop Columns
- parition_0
- parition_1
- parition_2
- parition_3
- Map New Data Type
- track_id string
- Your selections should match the screen image below:
- Select the Transform - ApplyMapping button on the screen
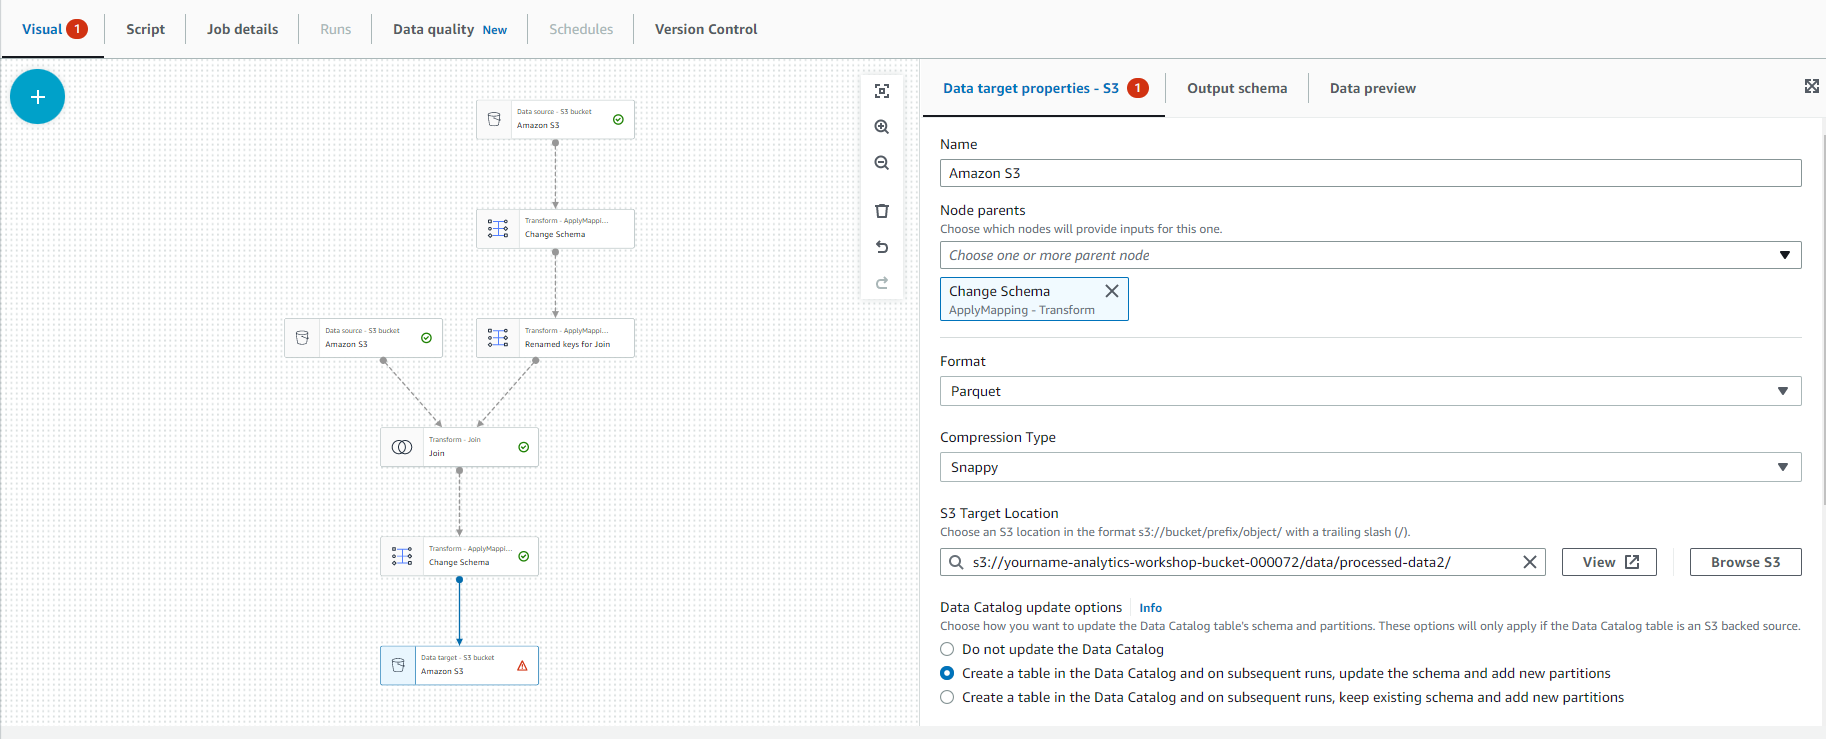
- Select “Target” and select S3 as shown below.
- Data target properties - S3:
- Format: Parquet
- Compression Type: Snappy
- S3 Target Location: s3://yourname-analytics-workshop-bucket/data/processed-data2/
- Data Catalog update options
- Choose Create a table in the Data Catalog and on subsequent runs, update the schema and add new partitions
- Database: analyticsworkshopdb
- Table name: processed-data2

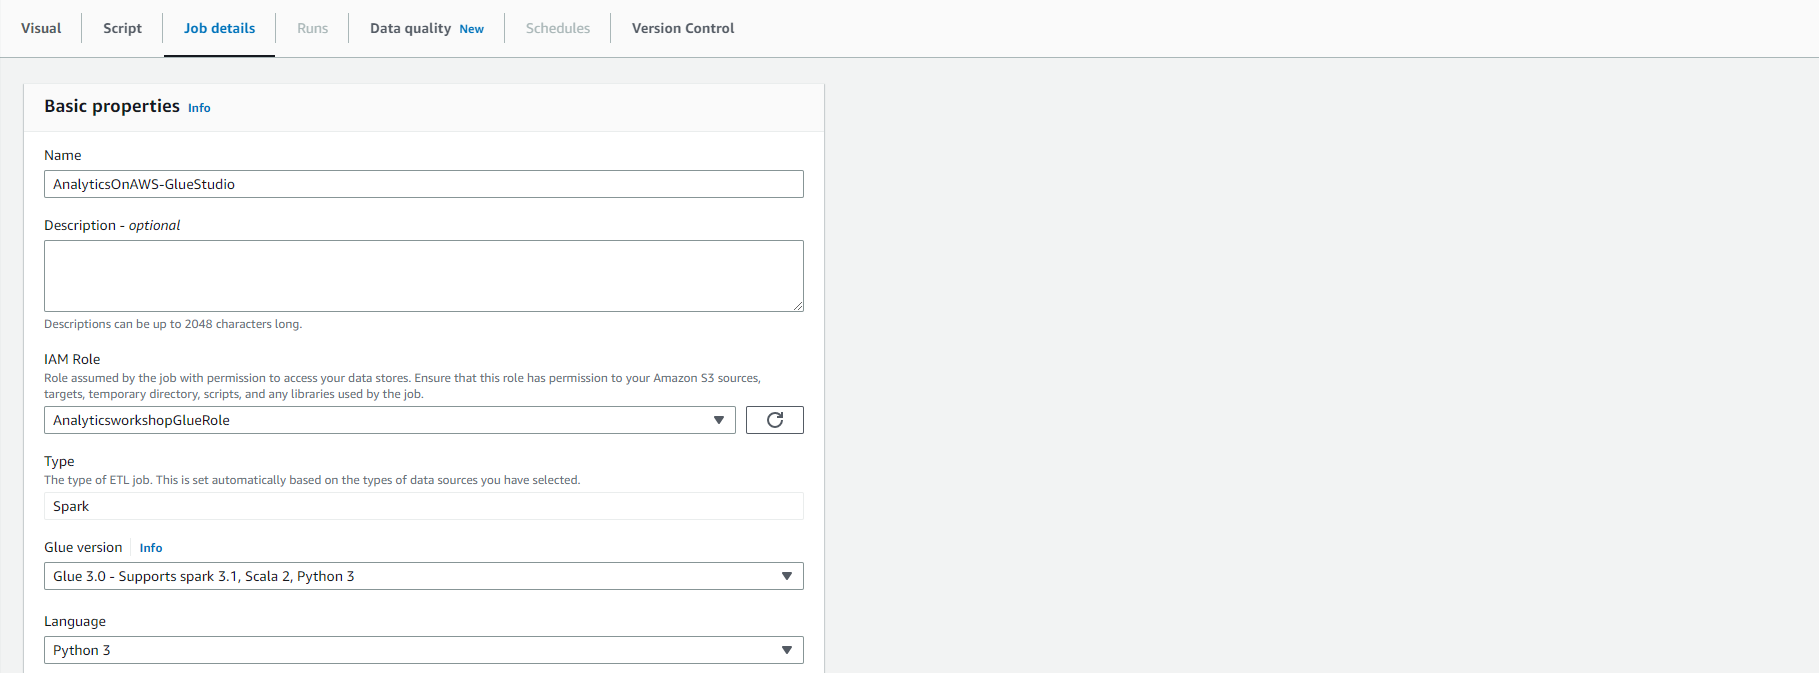
- Click Job details and configure:
- Name: AnalyticsOnAWS-GlueStudio
- IAM Role: AnalyticsWorkshopGlueRole
- Requested number of workers: 2
- Job bookmark: Disable
- Number of retries: 1
- Job timeout (minutes): 10
- Leave the rest as default value
- Click Save
- Click on “Save” and you will see the message “Successfully created job”. Start this ETL job by Clicking on “Run” in the top right corner of the screen.
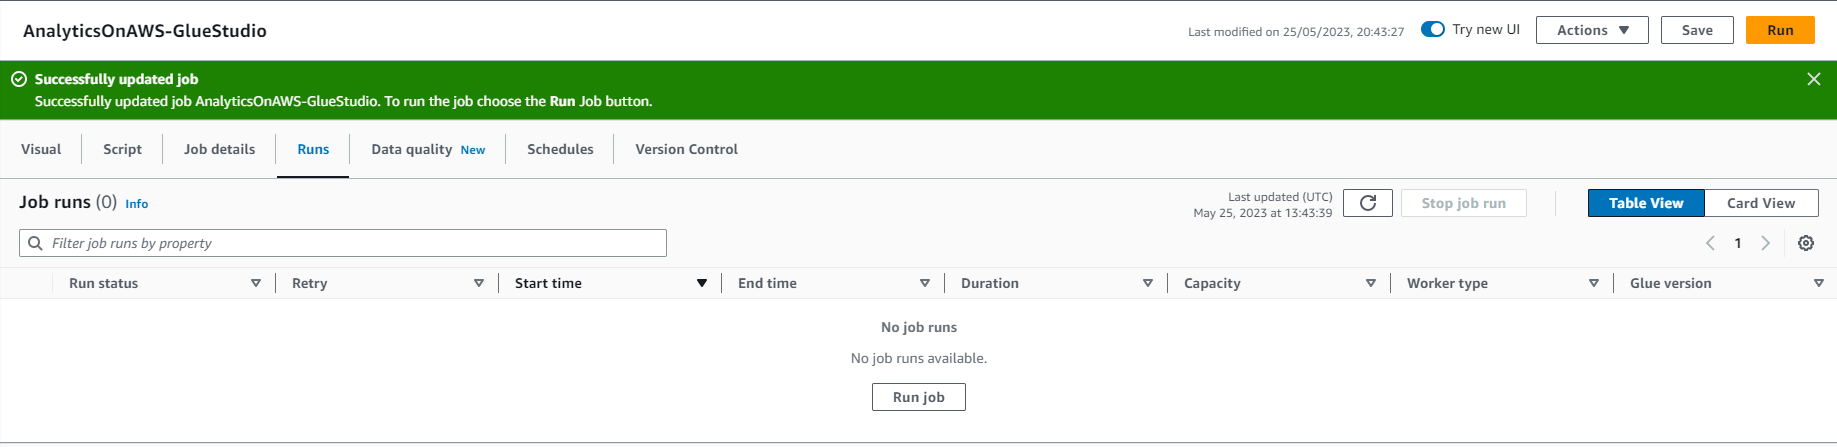
- You should see the message “Successfully started job”. Select “Run Details” to track your ETL jobs. Wait for a few seconds and you should see the ETL job Run Status “Succeeded”, as shown in the screenshot below.

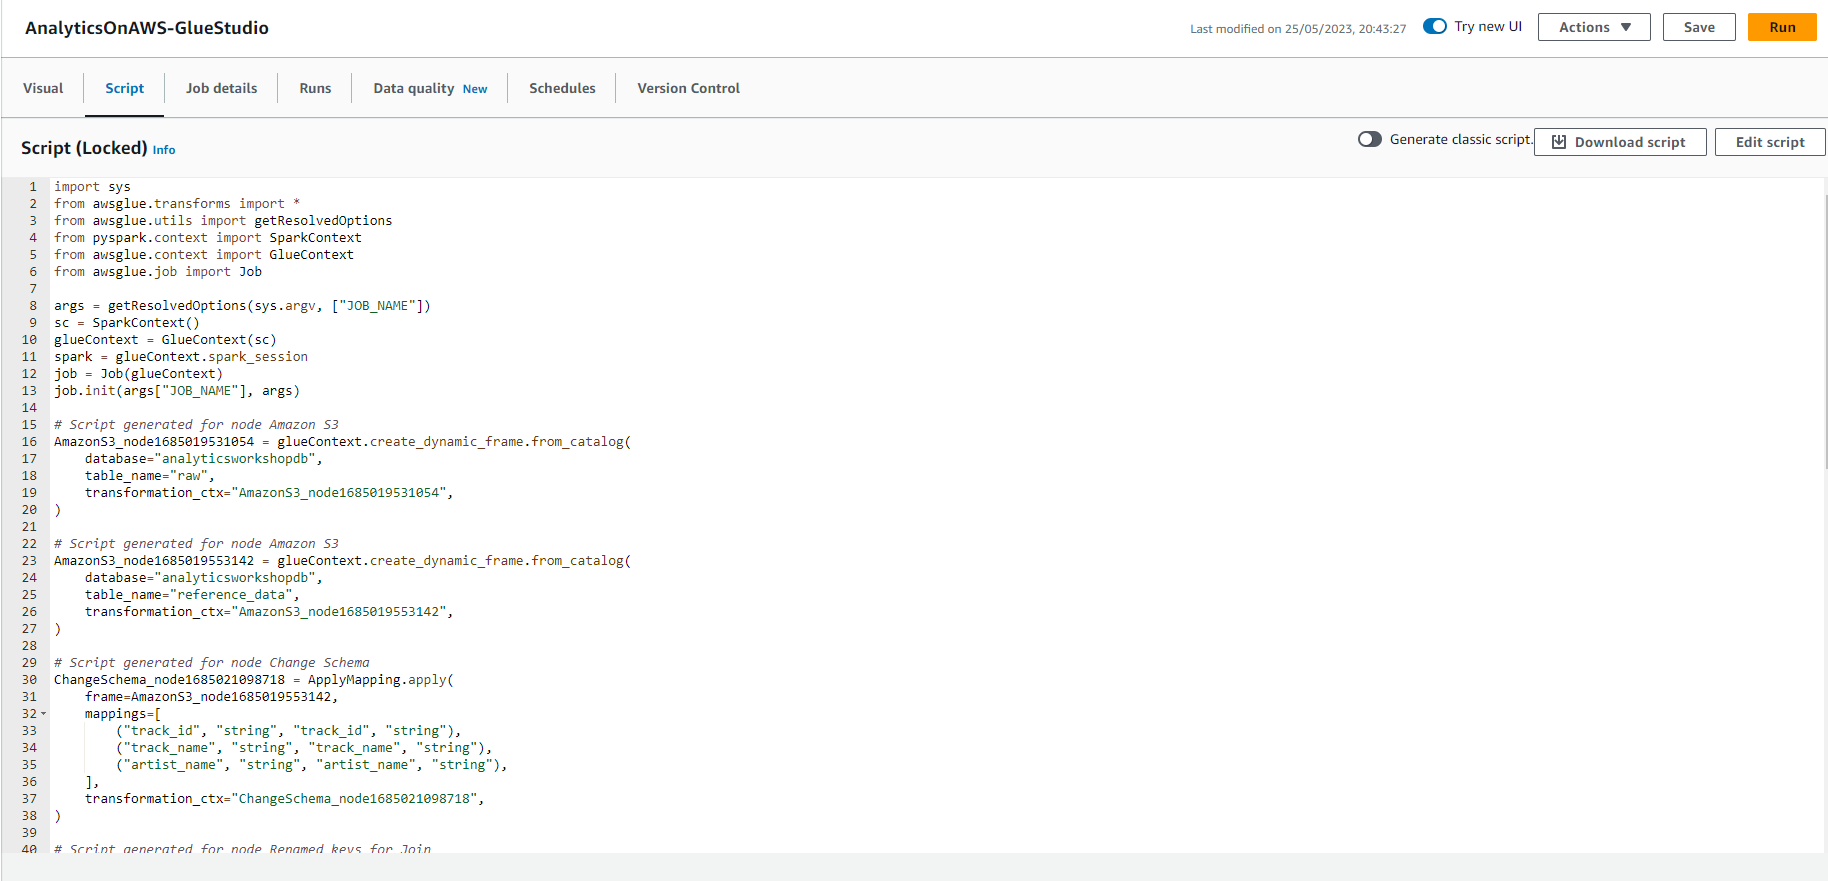
- You can view the Pyspark code that Glue Studio has generated and reuse it for other purposes as needed.
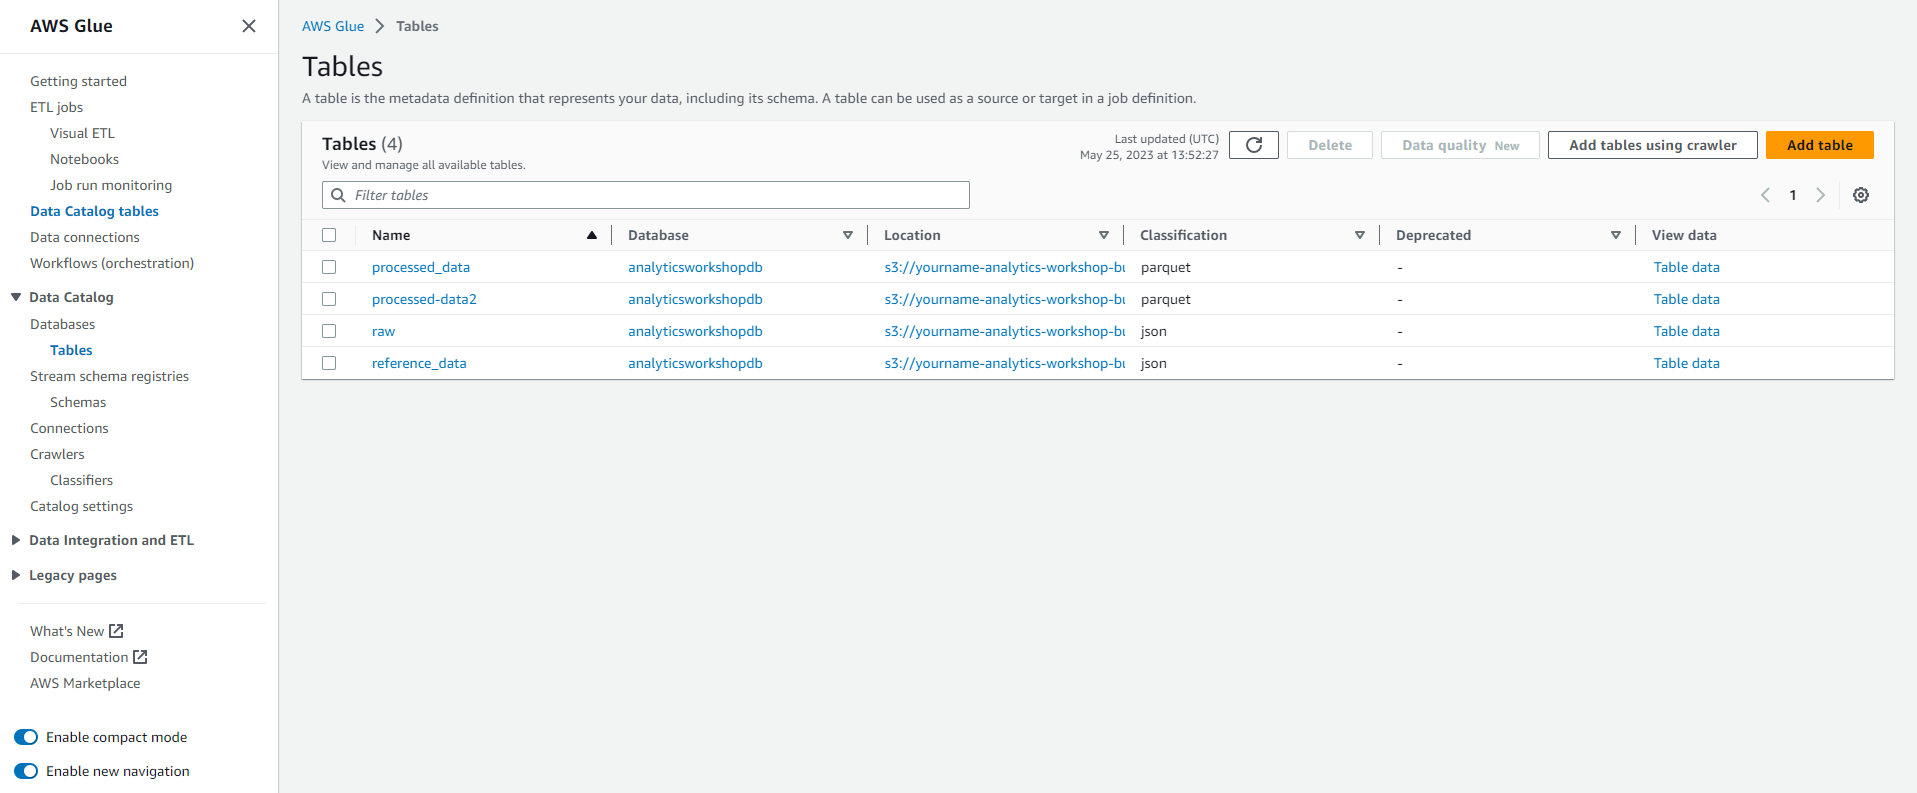
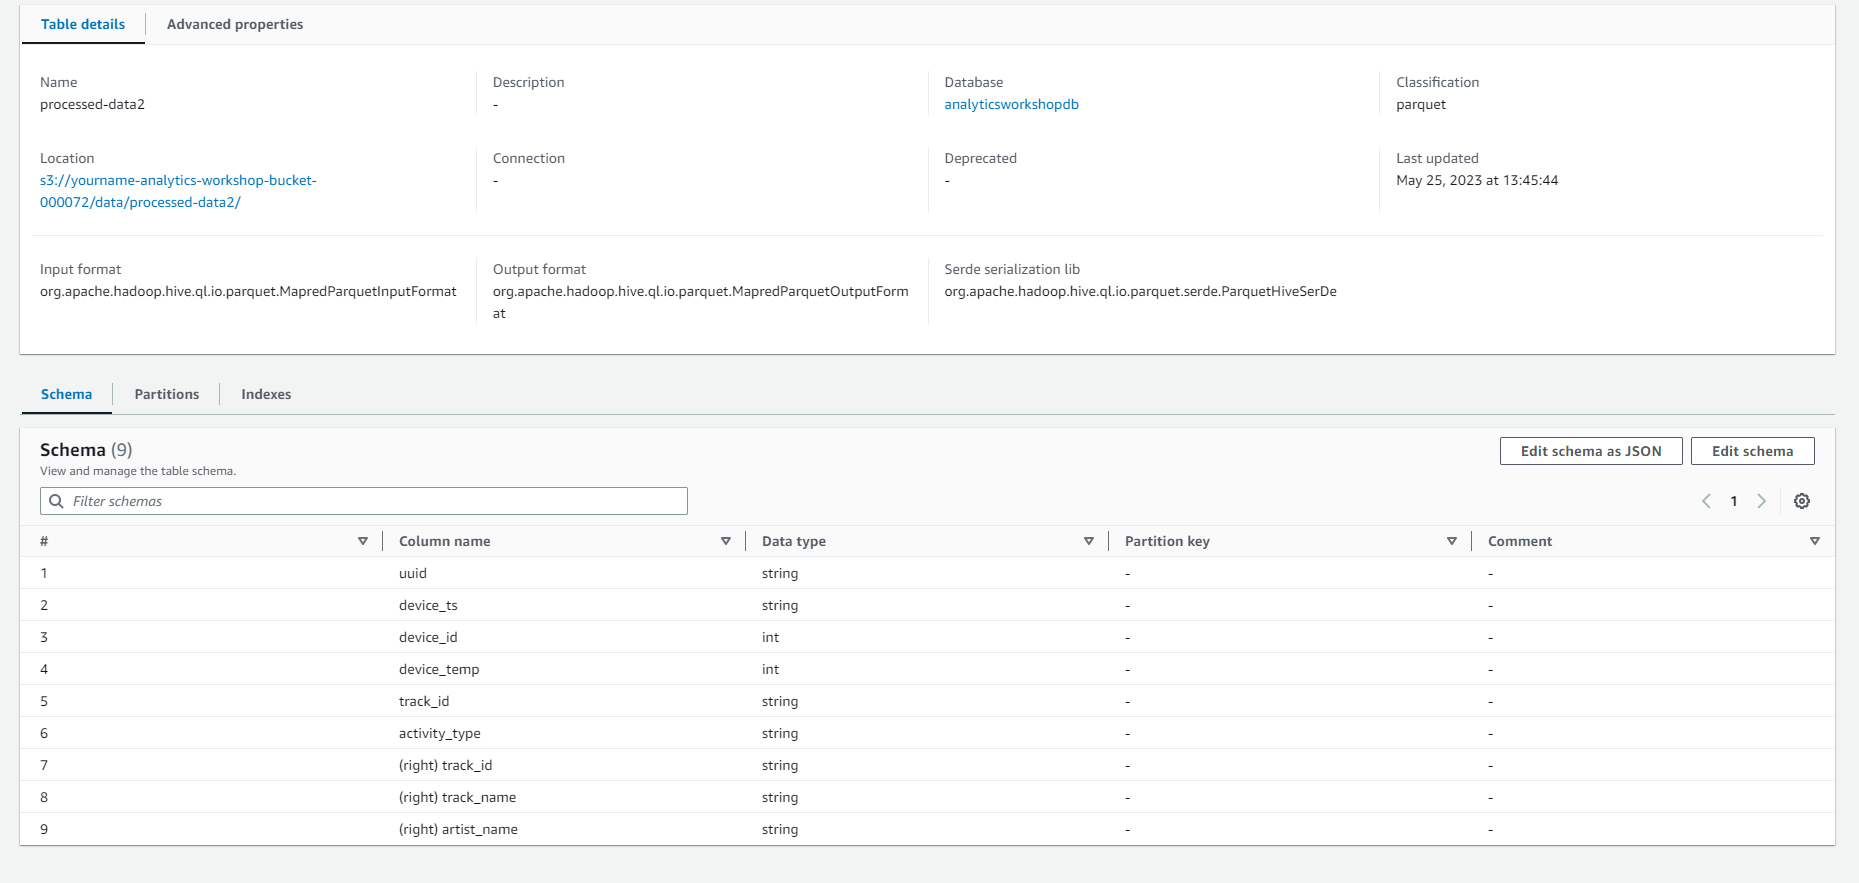
- Go to Glue DataCatalog: and you will see the processed-data2 table has been created in the analyticsworkshopdb database.
Excellent!! You have completed an additional ETL lab with AWS Glue Studio. With AWS Glue Studio, you can visually combine workflows that transform data and run them seamlessly on AWS Glue’s Apache Spark-based serverless ETL platform.