Warehouse on Redshift
Warehouse on Redshift
In this module, we will set up an Amazon Redshift cluster and use AWS Glue to load data into Amazon Redshift. We’ll learn about some design elements and best practices for creating and loading data into tables in Redshift, and performing queries on it.
- Prepare Glue IAM policies and roles
- Note: Skip this section if you have already created Glue IAM policies and roles in the “Data migration with AWS Glue (interactive session)” module and continue to the “Create IAM role for Redshift” section in the module- this boil.
In this step, you will access the IAM console and create Glue IAM policies and roles to work with Jupyter notebooks and AWS Glue Studio interactive sessions.
-
Let’s start by creating an IAM policy for the AWS Glue notebook role.
-
Select Policies from the panel on the left sidebar
-
Select Create policy
-
Select the JSON tab
-
Replace the default text in the policy edit window with the following policy statements.
{
  "Version": "2012-10-17",
  "Statement": [
    {
    "Effect": "Allow",
    "Action": "iam:PassRole",
    "Resource":"arn:aws:iam::<AWS account ID>:role/Analyticsworkshop-GlueISRole"
    }
  ]
}
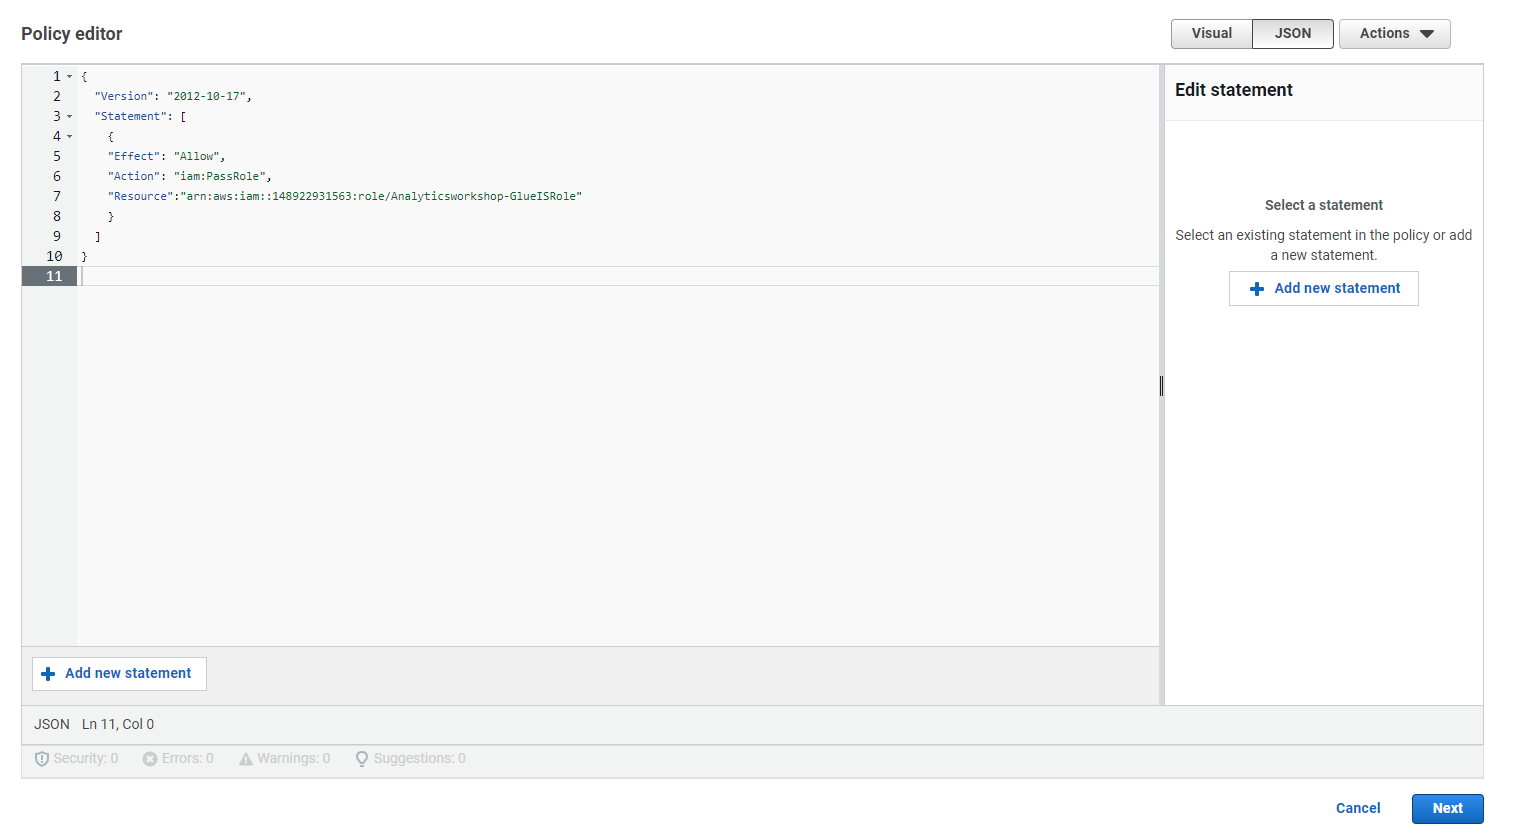
- Note that Analyticsworkshop-GlueISRole is the role we created for the AWS Glue Studio Jupyter notebook in the Next step.
-
Warning: Replace with your AWS account ID in the copied policy statement.
-
Select Next: Tags
-
Option to add Tags, for example: workshop: AnalyticsOnAWS
-
Select Next: Review
-
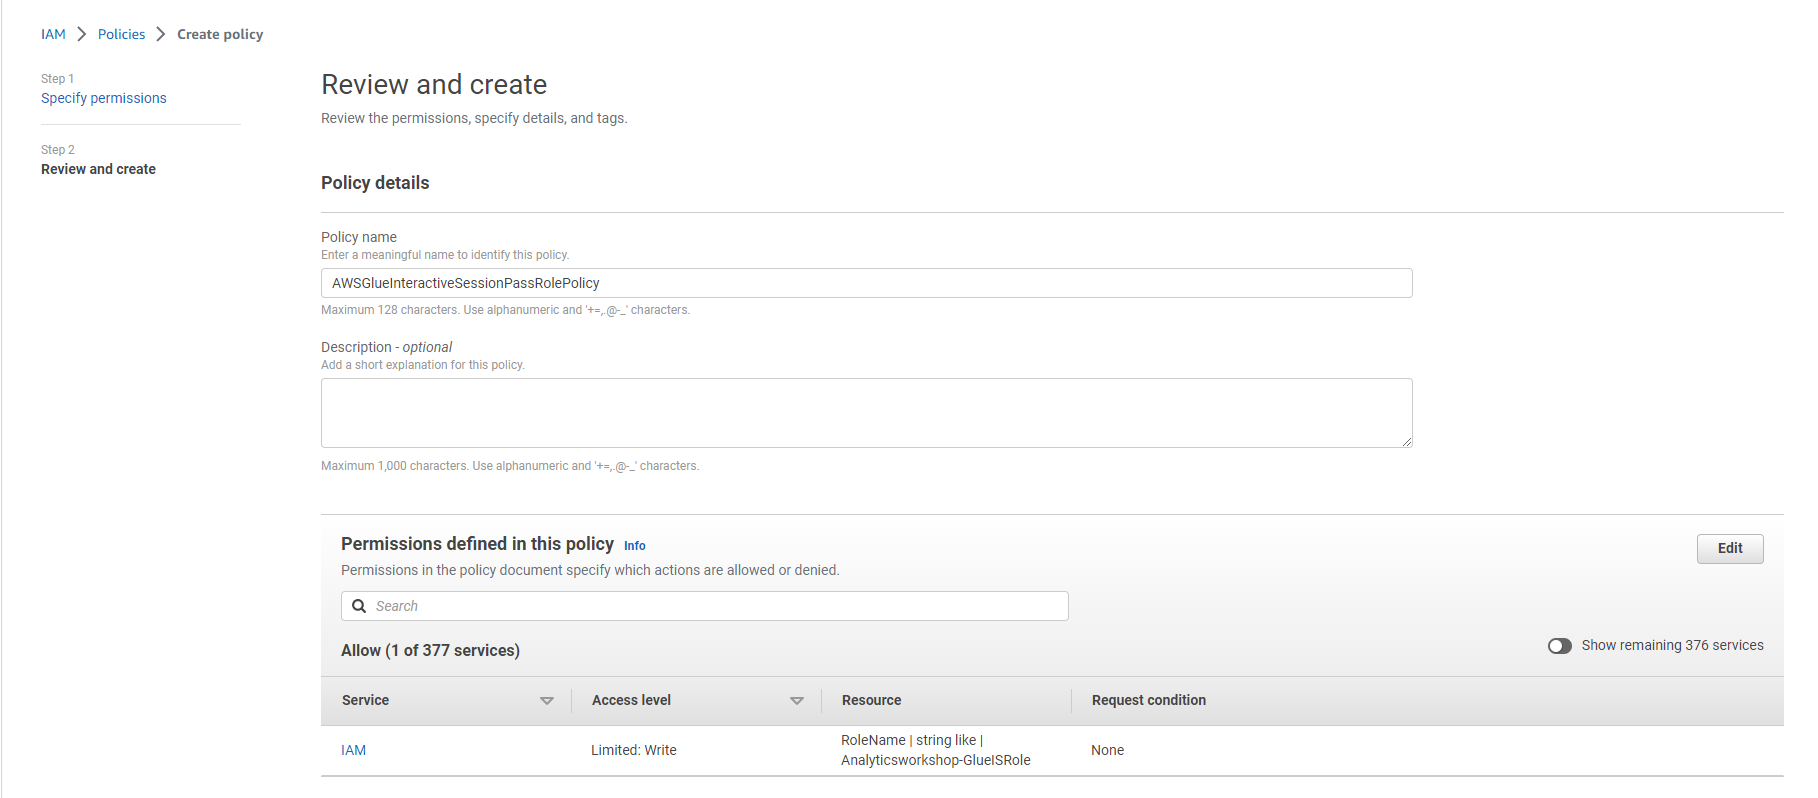
Policy name: AWSGlueInteractiveSessionPassRolePolicy
-
Option to write a description for the policy:
-
Description: policy that allows the AWS Glue notebook role to pass to interactive sessions so that the same role can be used in both places
-
Select Create policy

- Next, create an IAM role for AWS Glue notebooks
- Select Roles from the left panel
- Select Create role
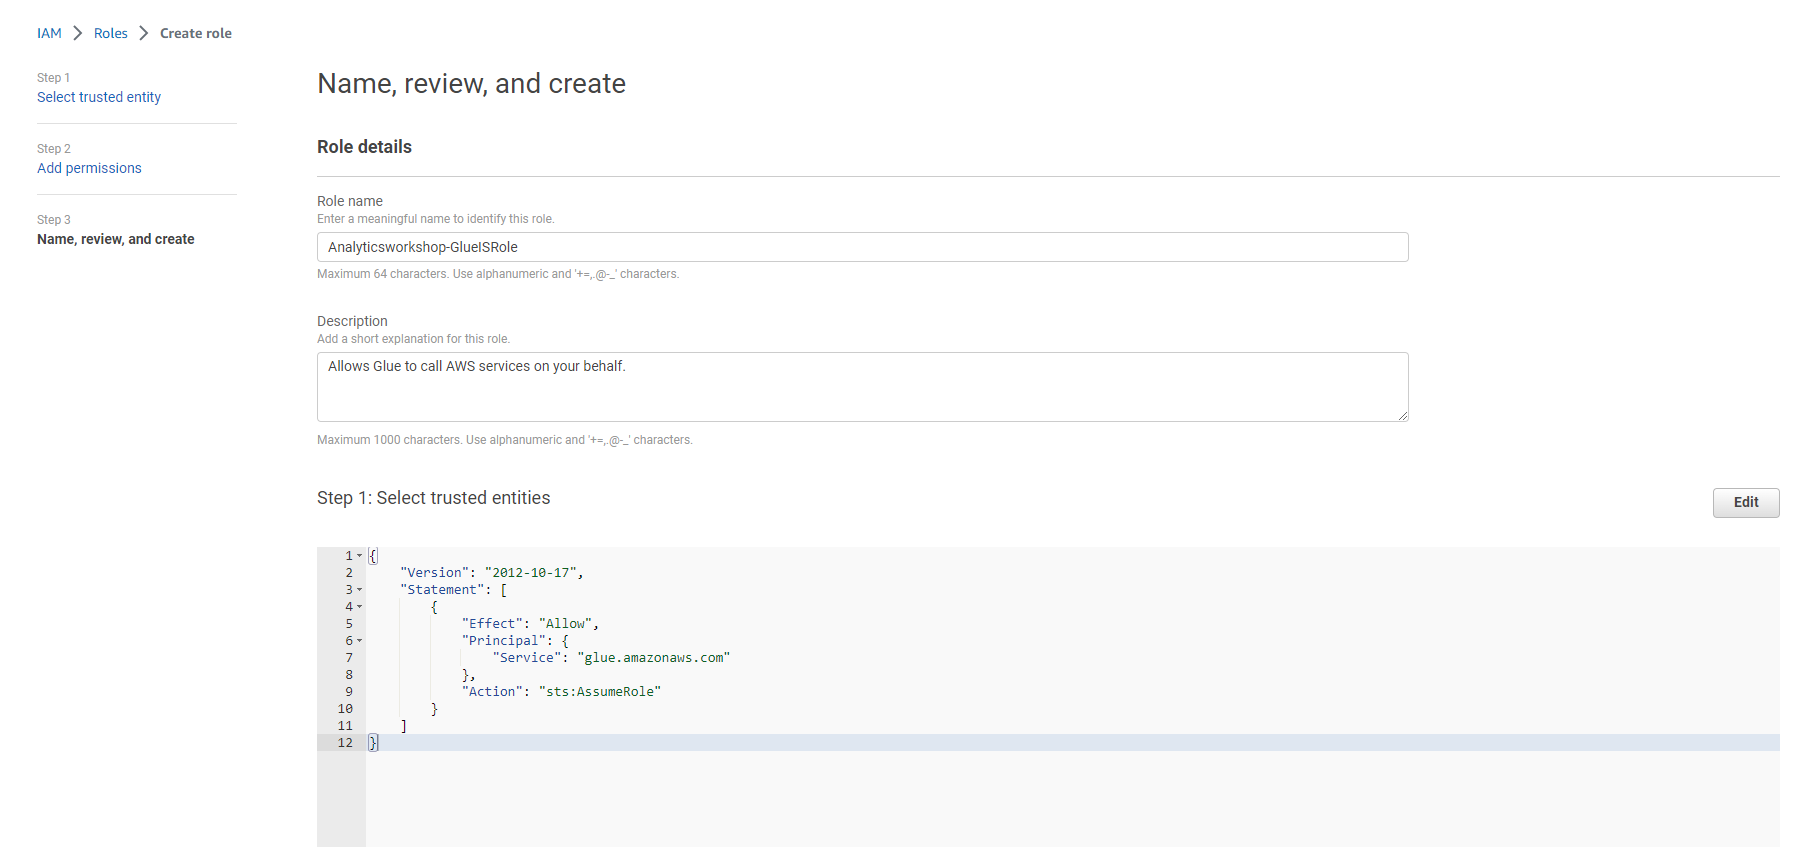
- Select the service that will use this role: Glue under Use Case and Use cases for other AWS services:
- Select Next
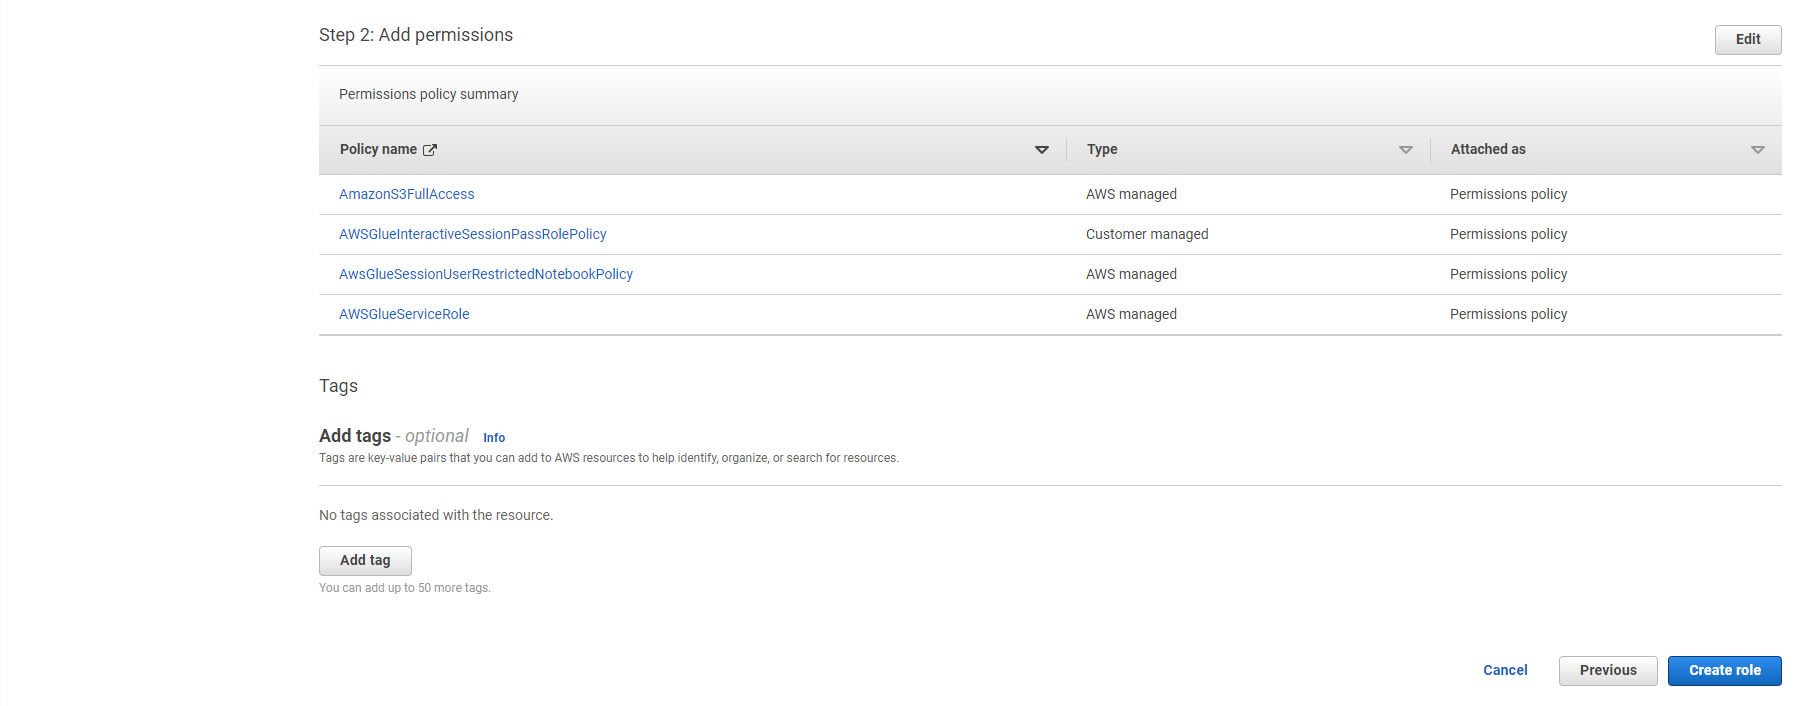
- Search for the following policies and check the check box next to them:
- AWSGlueServiceRole
- AwsGlueSessionUserRestrictedNotebookPolicy
- AWSGlueInteractiveSessionPassRolePolicy
- AmazonS3FullAccess
- Select Next

- Role name: Analyticsworkshop-GlueISRole
- Make sure only four policies are attached to this role (AWSGlueServiceRole, AwsGlueSessionUserRestrictedNotebookPolicy, AWSGlueInteractiveSessionPassRolePolicy, AmazonS3FullAccess)
- Option to add Tag, for example: workshop: AnalyticsOnAWS
- Select Create role
- Note: We have granted full access to S3 for the Glue role for the purposes of this practice session. It is recommended to grant only the permissions necessary to perform a task, i.e. adhere to the authority model as little as possible in the actual implementation.
- Create IAM role for Redshift In this step, we will create an IAM role for the Redshift cluster.
- Go to: Redshift Dashboard
- Select Create Role
- Select Redshift under Use case and Use cases for other AWS services:
- Choose Redshift - customizable
- Select Next
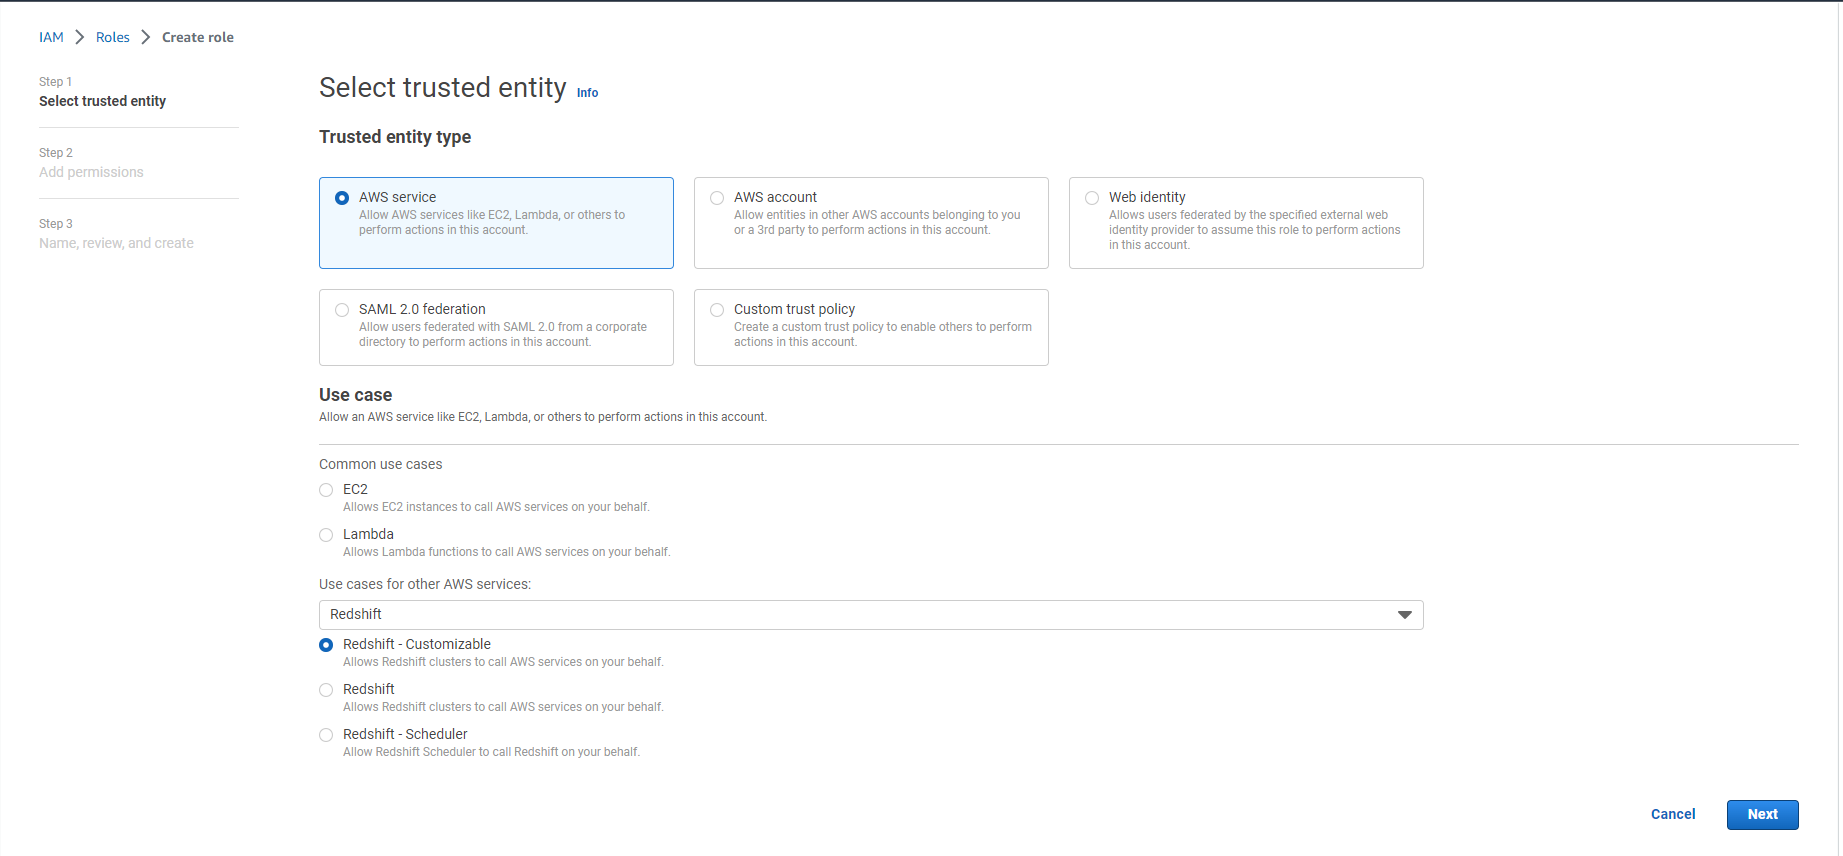
- In the Search box, search and select the following two policies
- AmazonS3FullAccess
- AWSGlueConsoleFullAccess
- Select Next
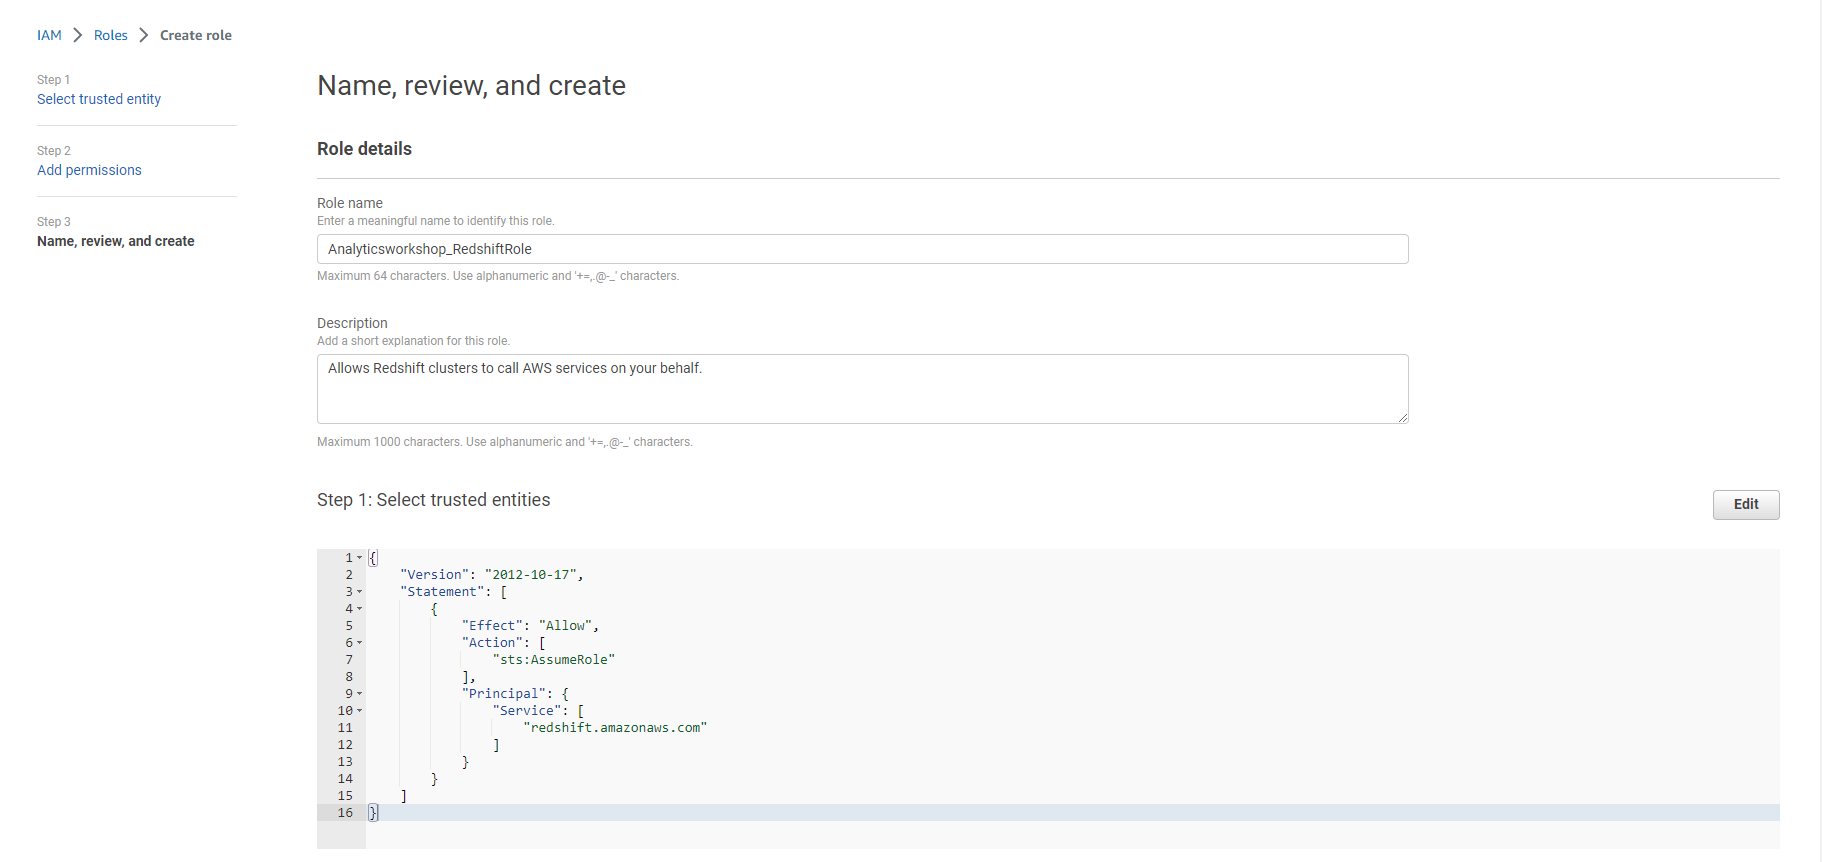
- Set Role name as Analyticsworkshop_RedshiftRole Verify that the following two policies are attached to the role:
- AmazonS3FullAccess
- AWSGlueConsoleFullAccess
- Optionally add Tags, for example: workshop: AnalyticsOnAWS
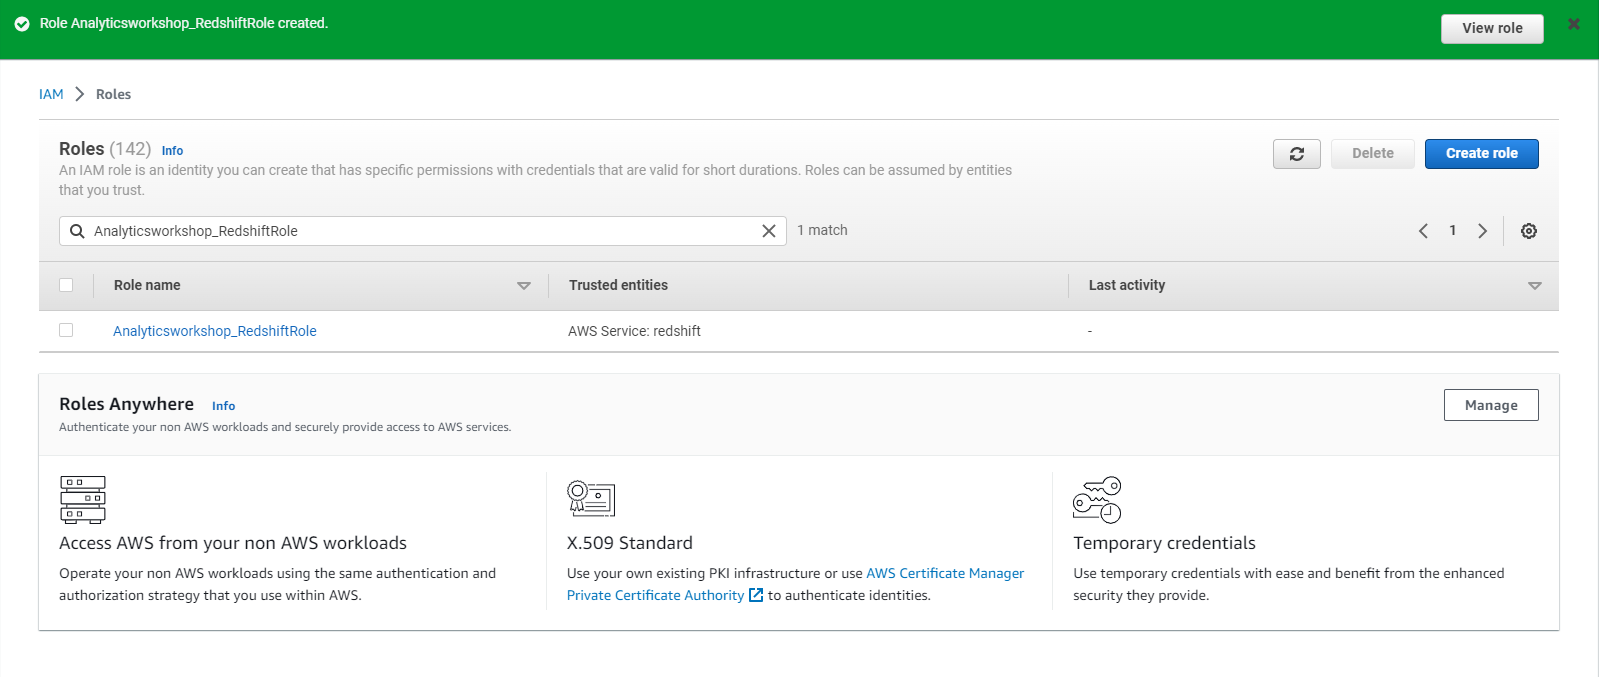
- Select Create Role

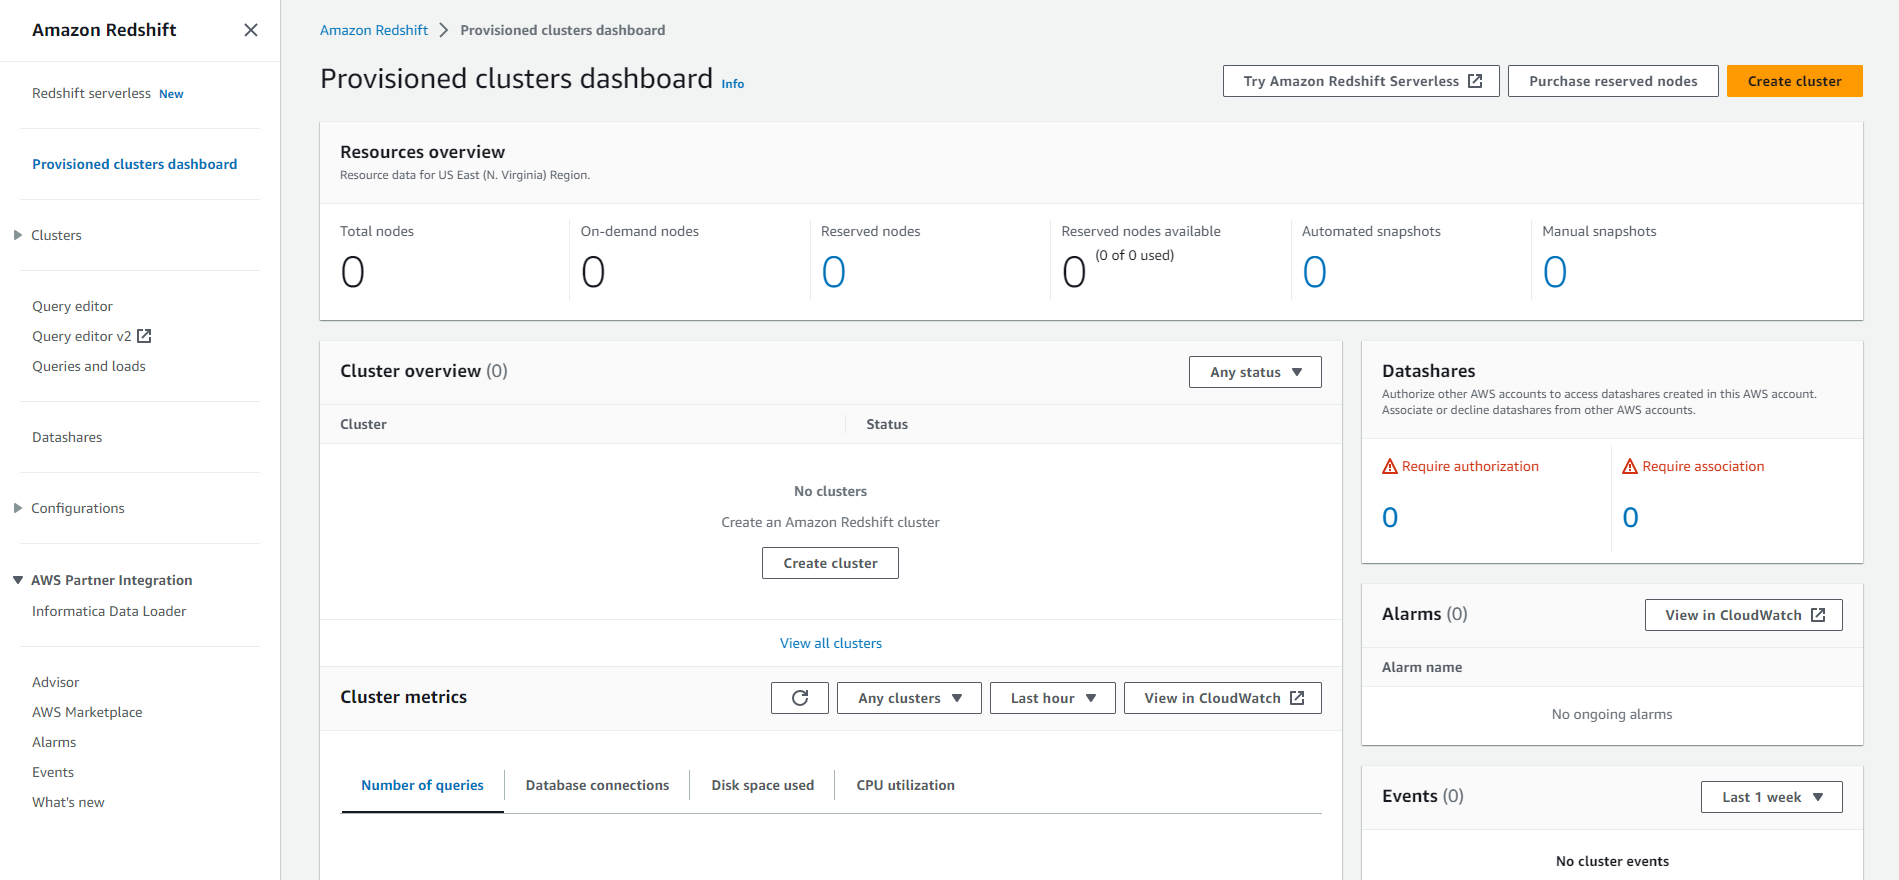
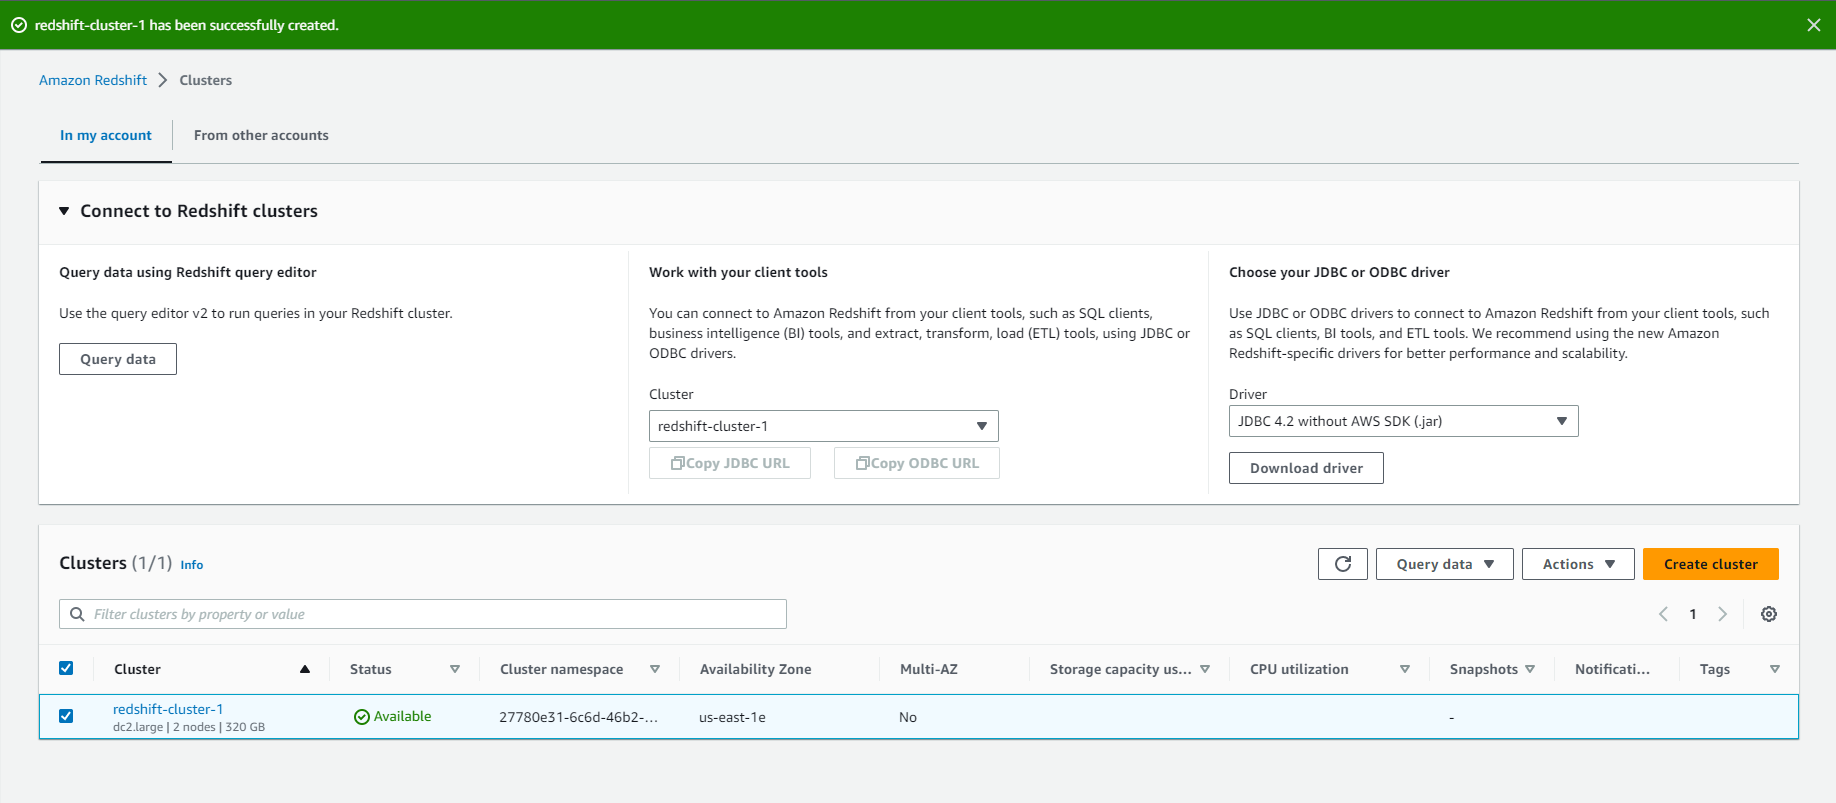
Create Redshift cluster
- In this step, you will create a Redshift cluster of 2 nodes to create a mini-database in a star model.
- Access to: Console
- Select Provision and manage clusters from the top left panel
- Select Create Cluster
- Keep the Cluster identifier as redshift-cluster-1
- Select dc2.large as Node Type
- Select Number of Nodes as 2.
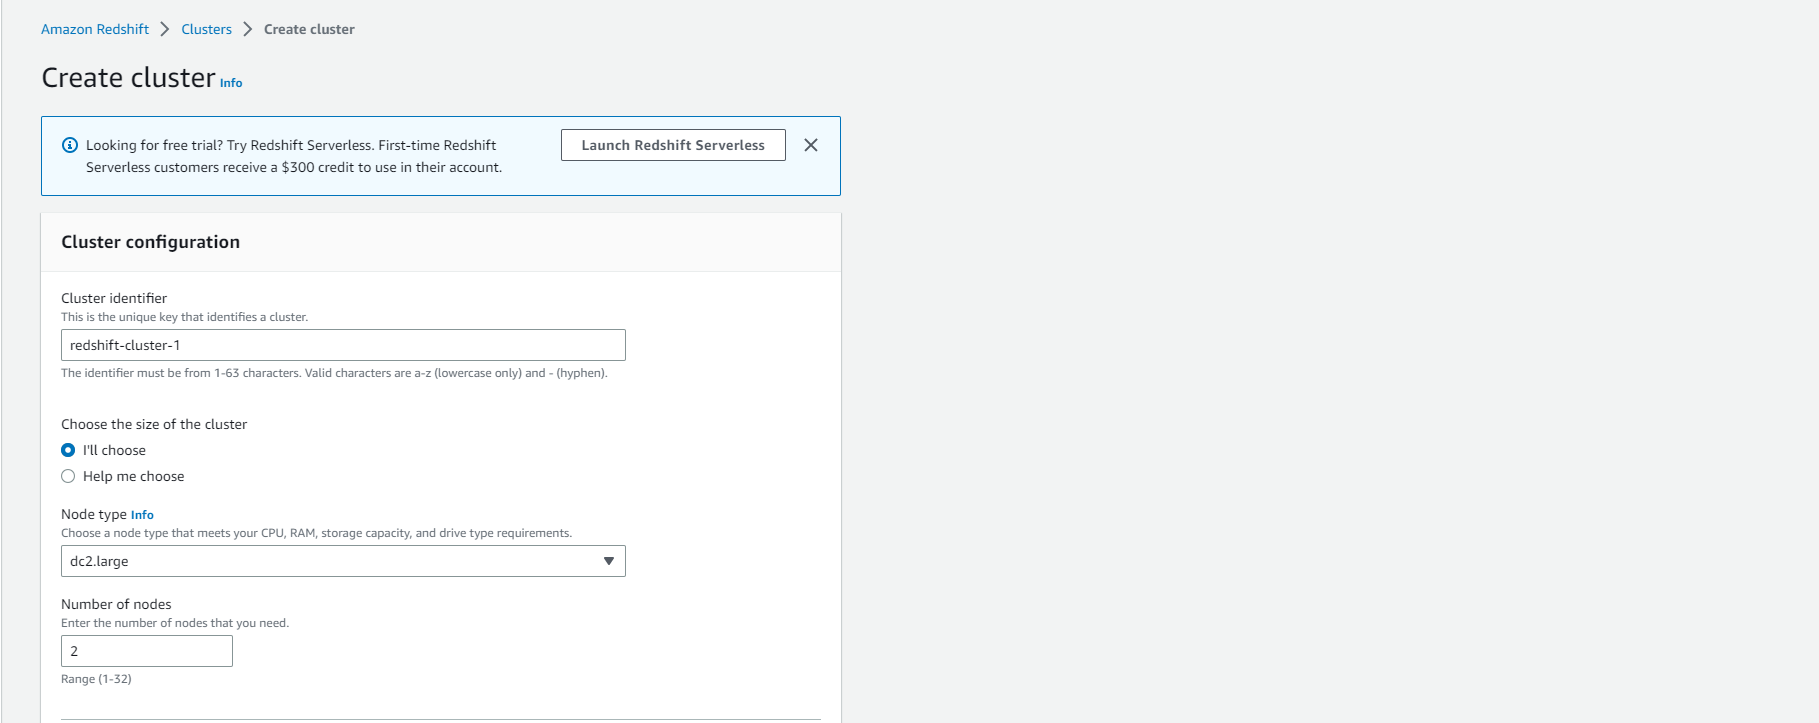
- Confirm the Configuration summary.
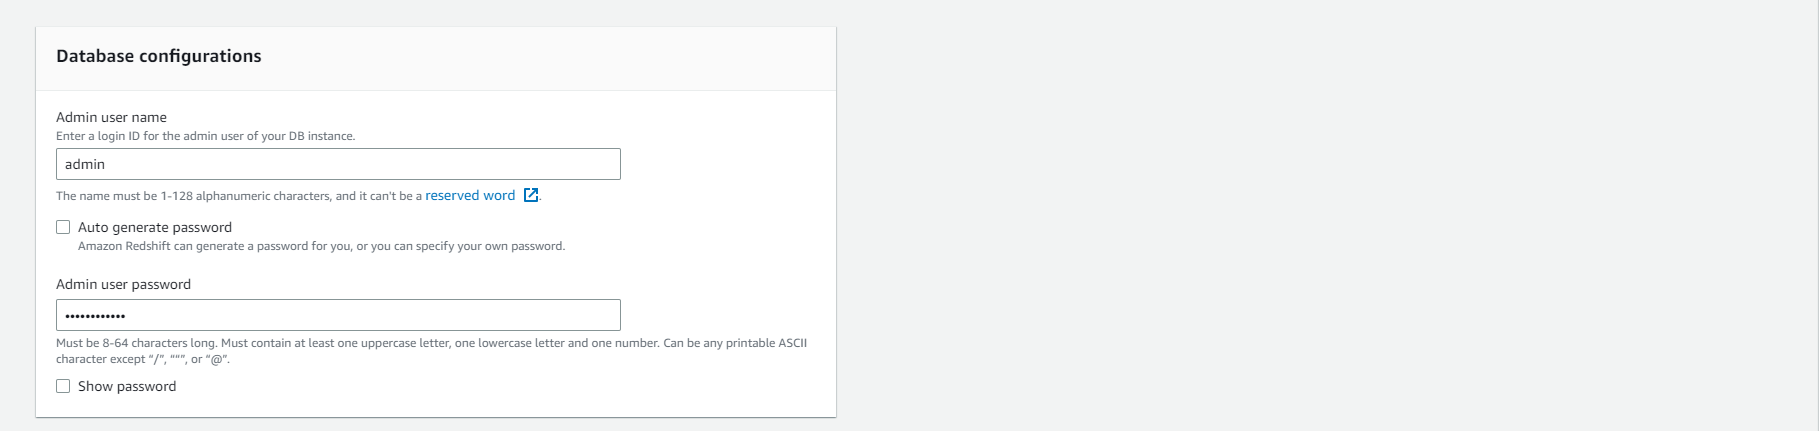
- Change Master user name to admin
- Enter Master user password.
- Check the password rules mentioned under Master user password before choosing a password. (This password will be used to access the cluster)
- Under Cluster permissions
- Select the Associate IAM role
- Select the previously created Analyticsworkshop_RedshiftRole.
- Select Associate IAM roles
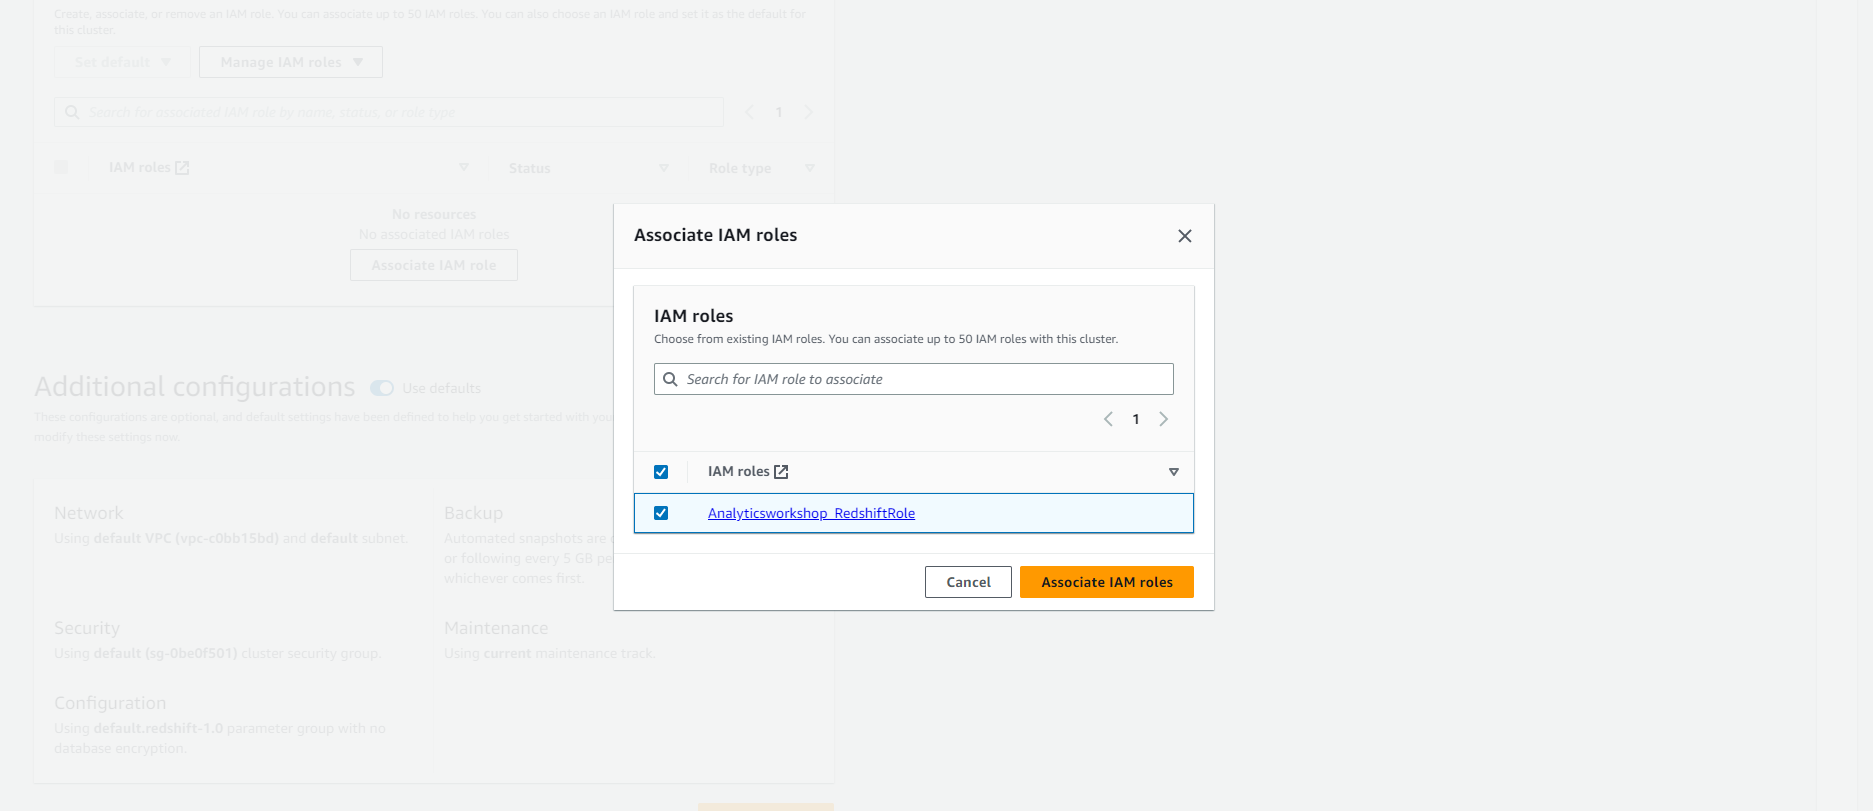
- Analyticsworkshop_RedshiftRole will appear under Associated IAM roles
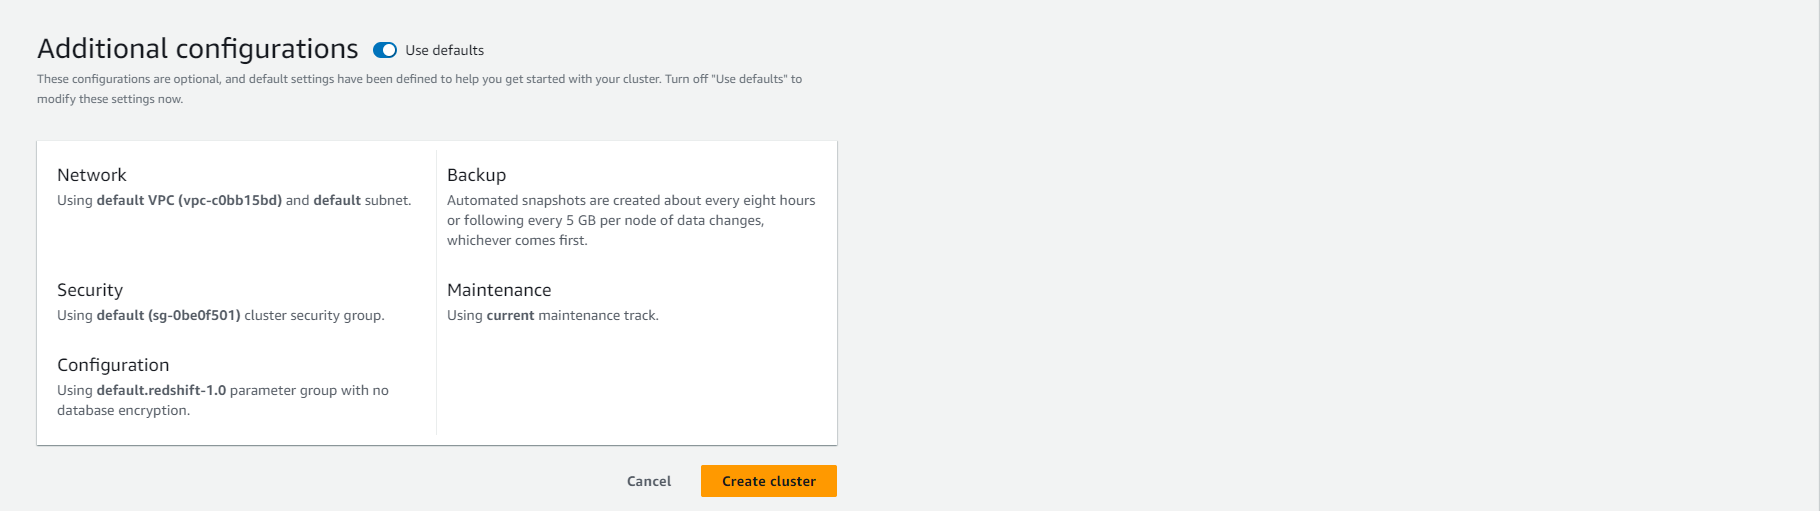
- Keep Additional configurations by default. It uses default VPC and default security group.
- Select Create cluster
- It takes a few minutes for the cluster to become available.
- After the cluster has been started and is in the Available state, move on to the Next step.
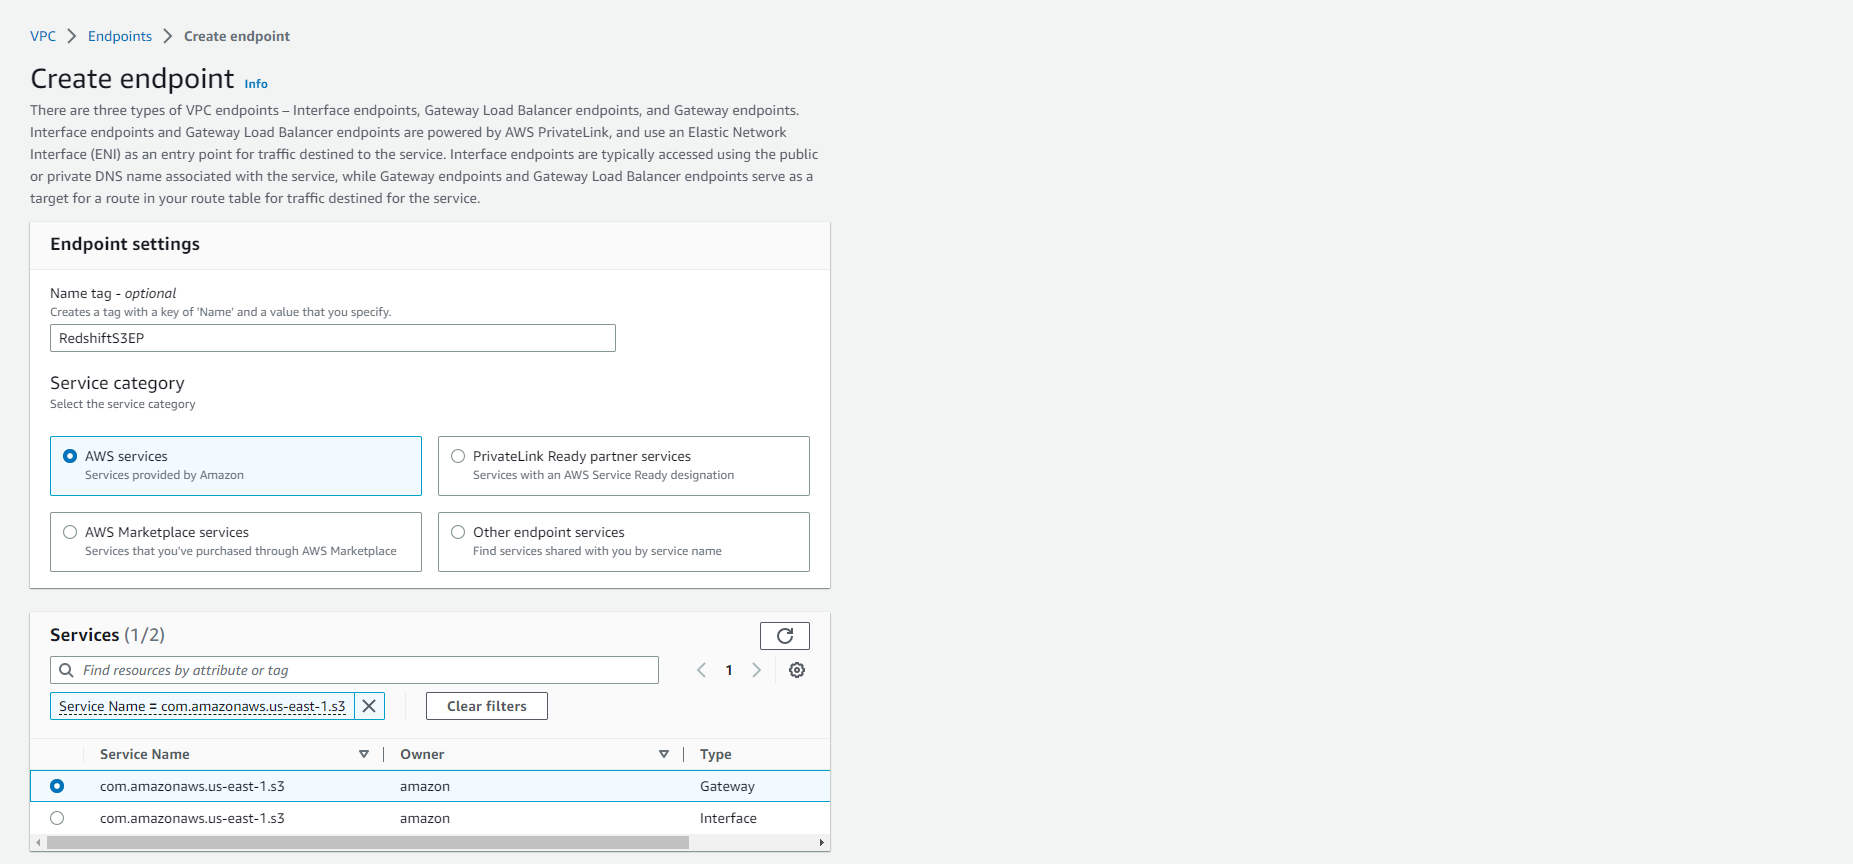
Create S3 Gateway Endpoint
- In this step, we will create the S3 Gateway Endpoint so that the Redshift cluster can communicate with S3 using the private IP address.
- Access: AWS VPC Console
- Select Create endpoint

- Name tag - optional: RedshiftS3EP
- Select AWS Services in the Service category (this is the default option)
- In the Service name search box, search for “s3” and Select Enter/Return.
- com.amazonaws.us-east-1.s3 will appear as search results. Select this option with type as Gateway.
- Select VPC, select default VPC. This is the same VPC that was used to configure the redshift cluster.
- If more than one VPC is listed in the drop-down list, double check Redshift’s VPC to avoid misunderstandings. Perform the following steps:
- Access: Redshift Dashboard
- Select redshift-cluster-1
- Select the Properties tab.
- Scroll down and check the Network and security section to find the VPC name.
- After checking the VPC ID again, continue to configure the Route tables section.
- Select the listed routing table (this should be the main routing table). You can verify this by checking Yes in the Primary column.
- Keep the default for Policy. (Full access)
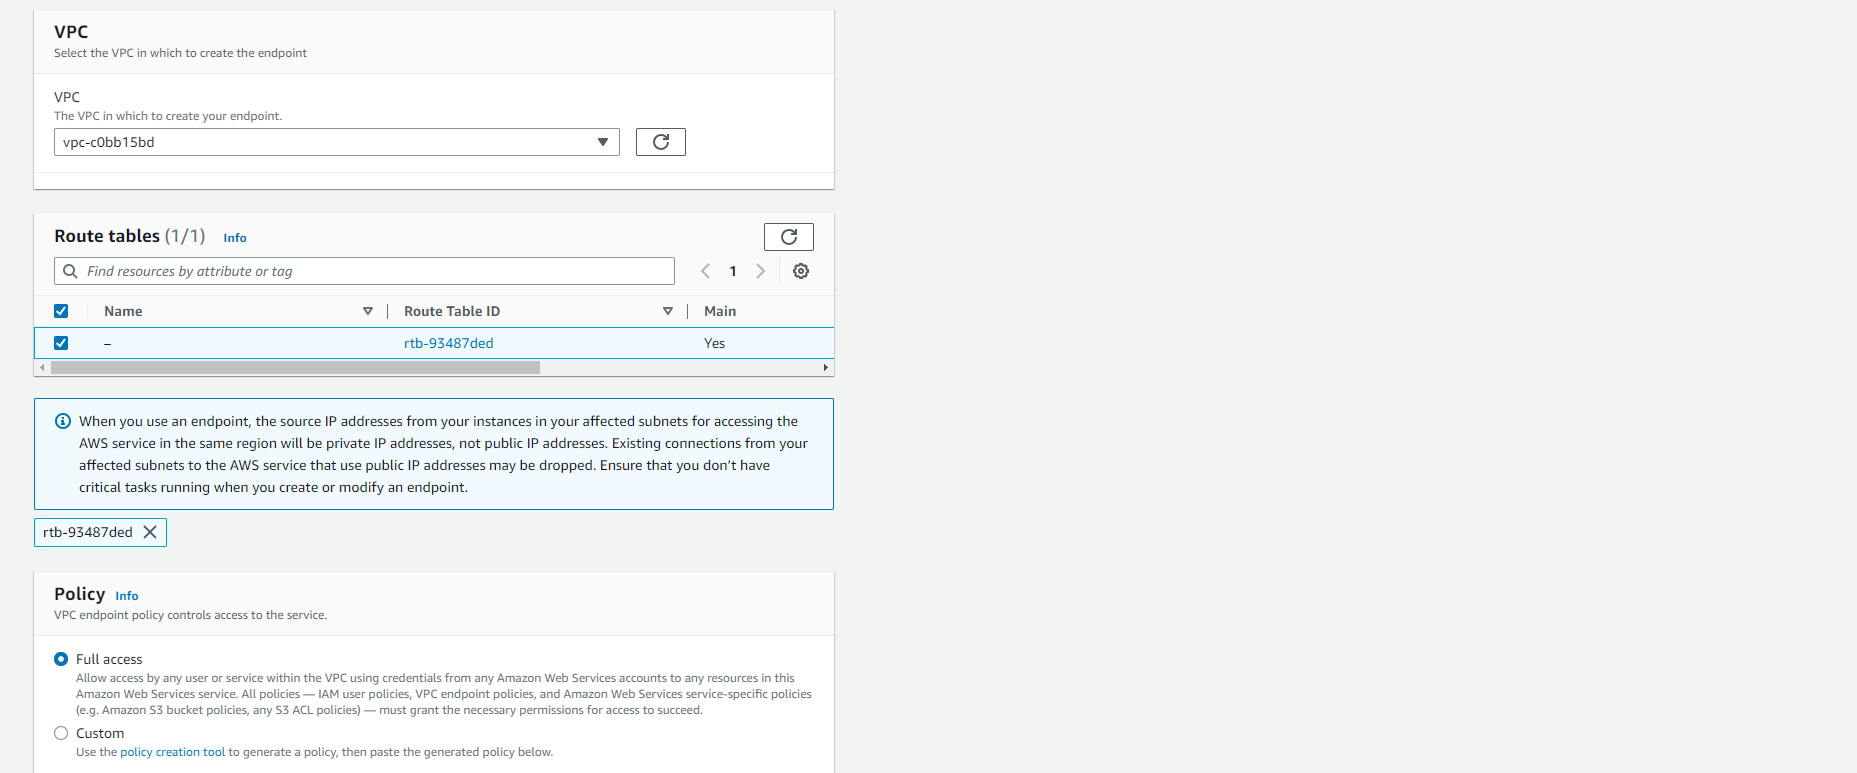
- Optionally add Tags, for example: * workshop: AnalyticsOnAWS
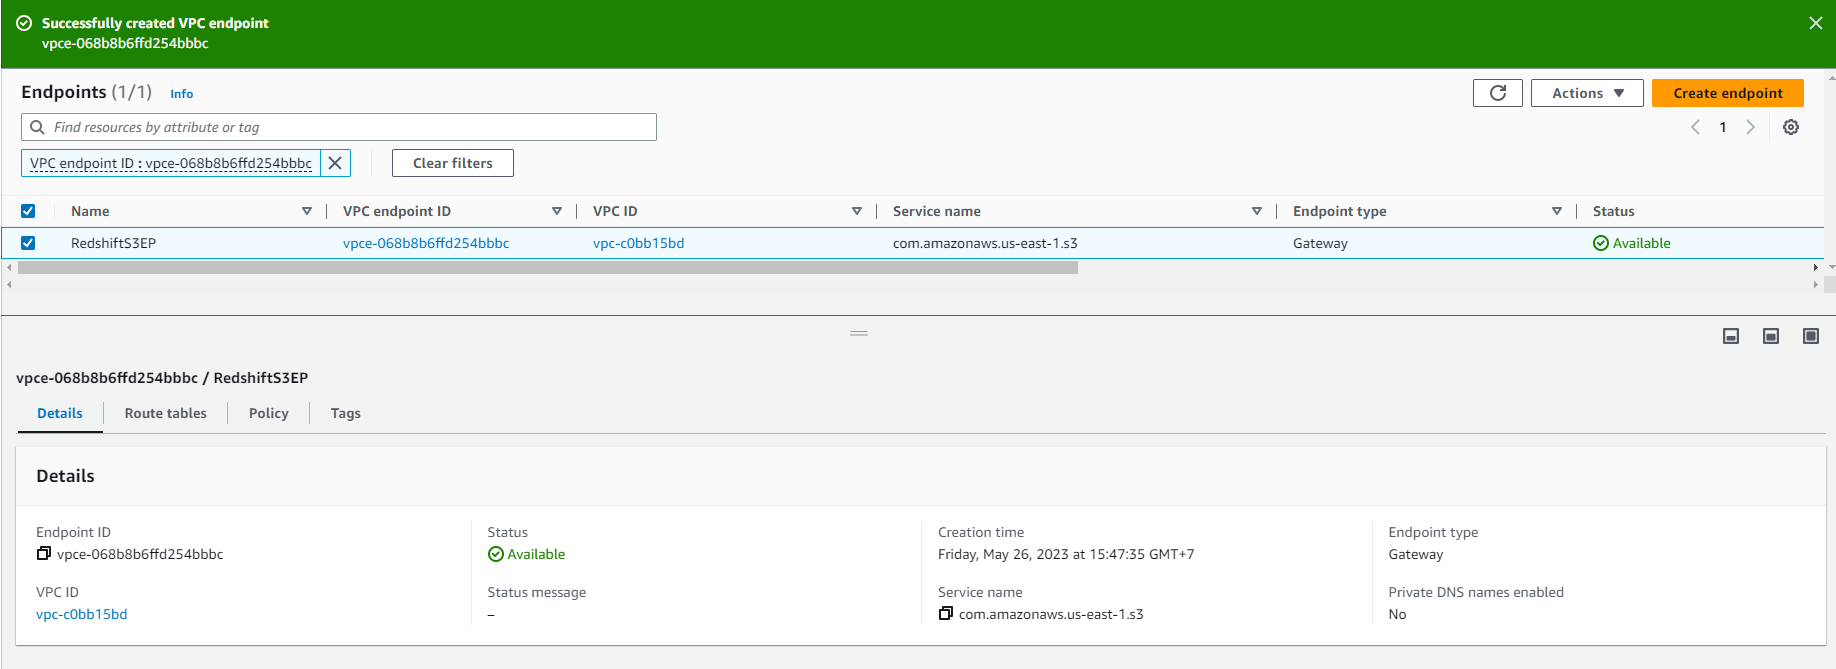
- Select Create endpoint. Provisioning this endpoint may take a few seconds. When this endpoint is ready, you will see Status as Available for the newly created S3 endpoint.

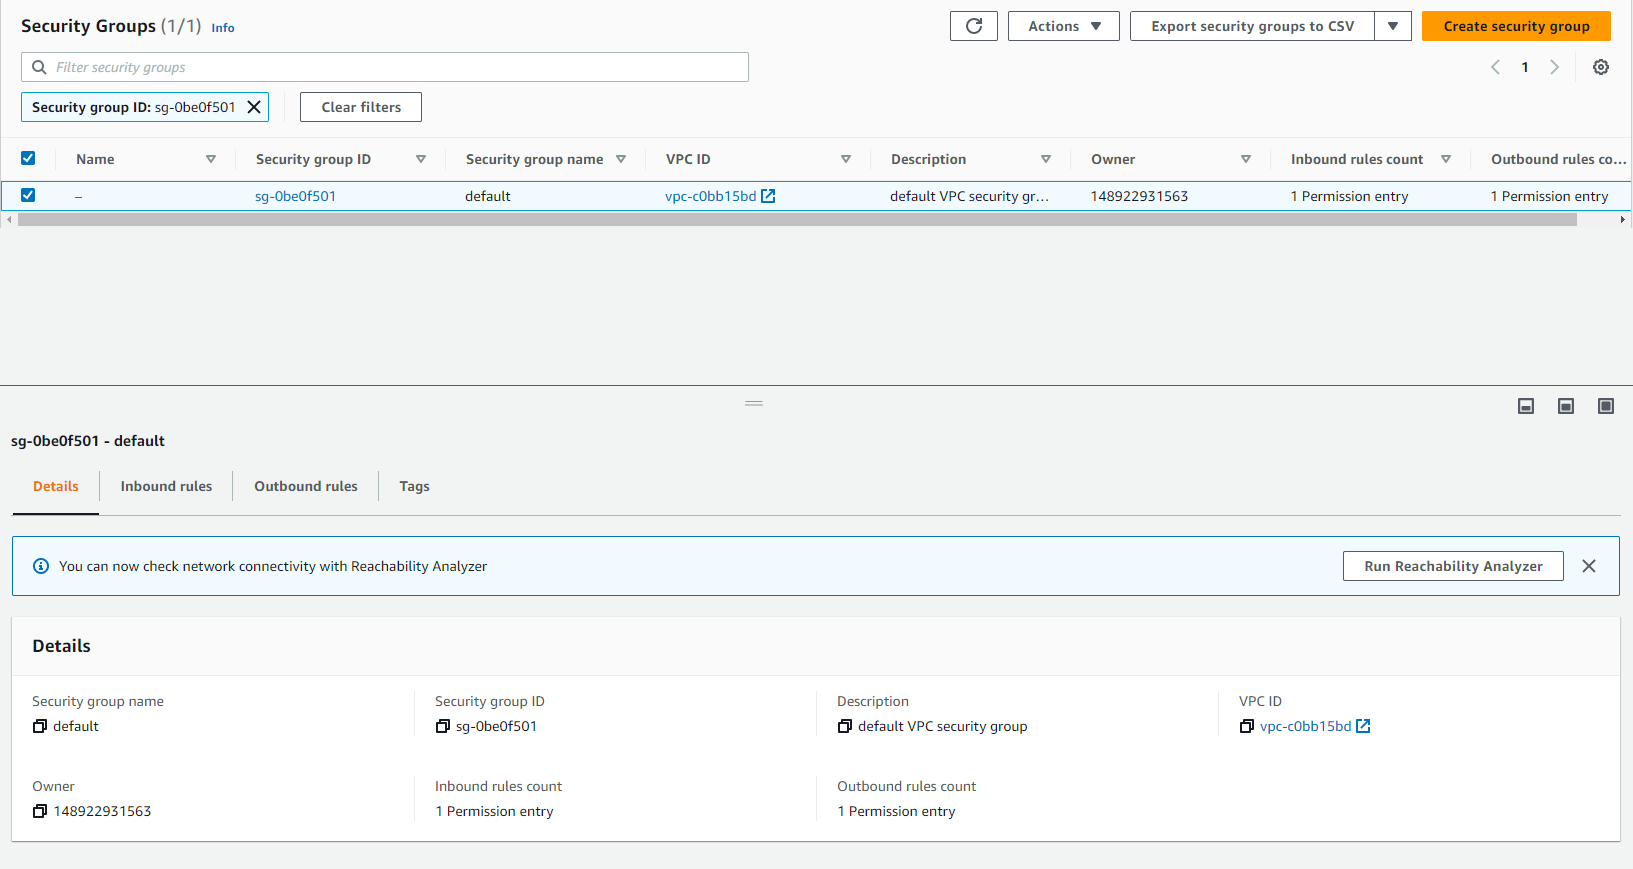
Verify and add rules to default security group
- In this step, you will verify and add rules to the Redshift security group so that the Glue service can talk to Redshift.
- Access: VPC security groups.
- Select security group Redshift. If the default security group is not changed during Redshift cluster creation, it will be the default security group.
- If you have more than one security group in the list, follow the steps below:
- Access: Redshift Console.
- Select redshift-cluster-1
- Select the Properties tab.
- Scroll down and check the Network and security section to find the Security Group id.
- After the Security Group has been verified, select Security Group (check box at the beginning of the line).
- Select Inbound Rules.
- Select Edit inbound rules.
- Check if there is a rule that points to yourself. (This rule should be available by default, but if not, add a rule as listed below)
- Type: All Traffic
- Source: [Name of the security group along with the security group you are editing] Note: The self-pointing rule is necessary for Glue components to communicate.
- Add HTTPS rule for Amazon S3 access.
- Type: HTTPS
- Source: Custom
- Note : Under Source select Custom and type “pl”
- Click Save rules.
- Click Outbound Rules.
- Click Edit rules
- Type as “All Traffic”
- Add a self-referencing rule.
- Type: All TCP
- Source: [Name of the same security group which you are editing] Note : A self-referencing rule is required for Glue components to communicate.
- Click Save rules.
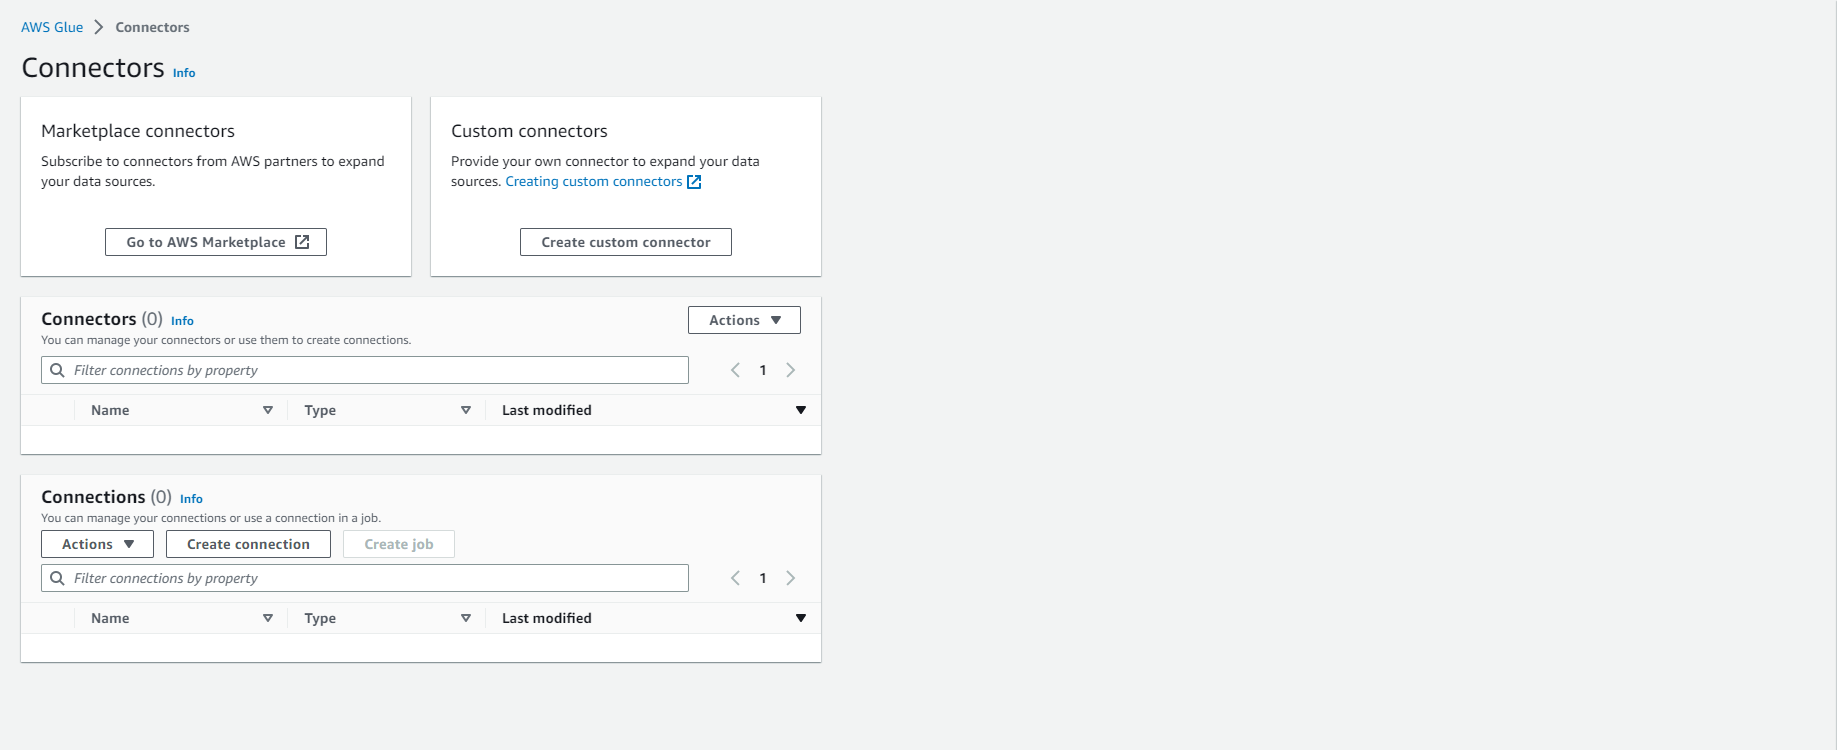
Create Redshift connection in Glue Connection.
- In this step, we will create a Redshift connection in the Glue connection that we can use in the Development Endpoint to establish a connection with Redshift.
- Access to: Glue Connections Dashboard
- Under Connections Click Create connection
- Set the connection name to analytics_workshop.
- Select connection type as Amazon Redshift.
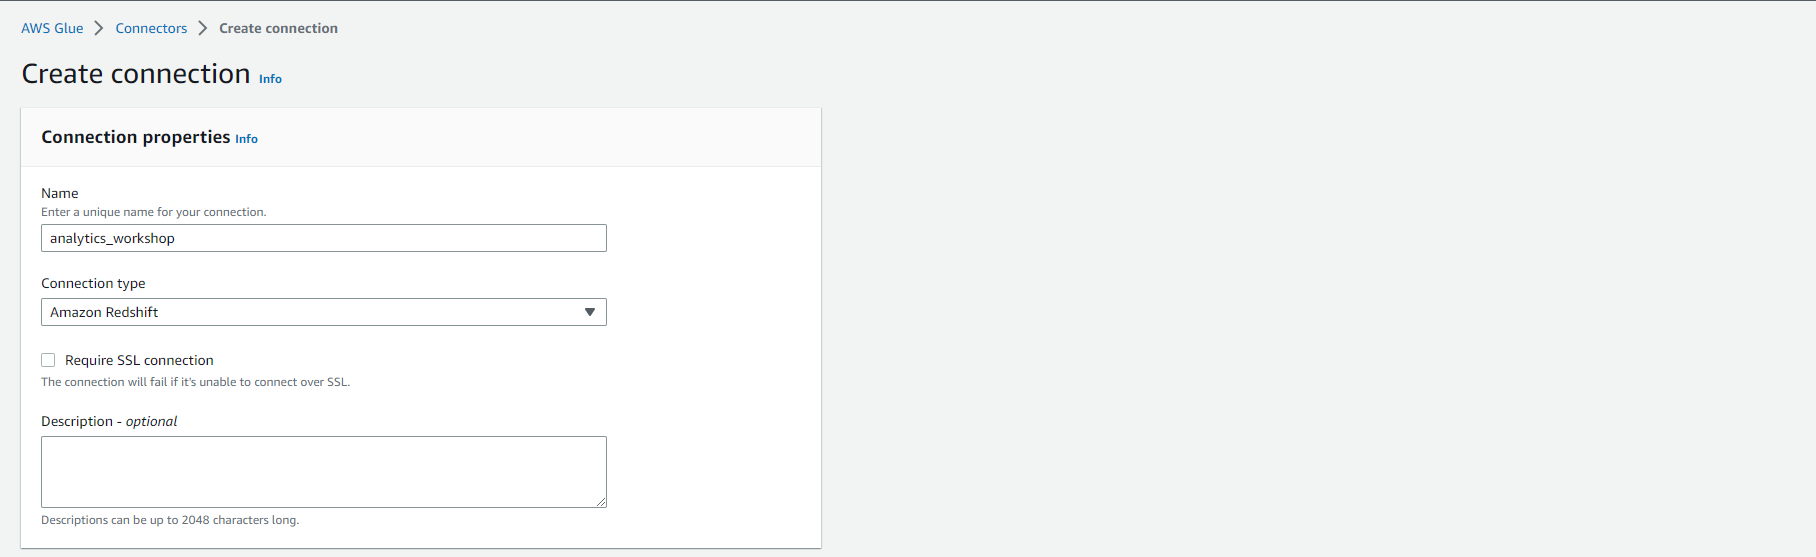
- Connection access permission settings:
- Select Database instances as redshift-cluster-1
- Database name and Username will automatically be filled in as dev and admin respectively.
- Password: Enter the password that you used during the installation of the Redshift cluster.
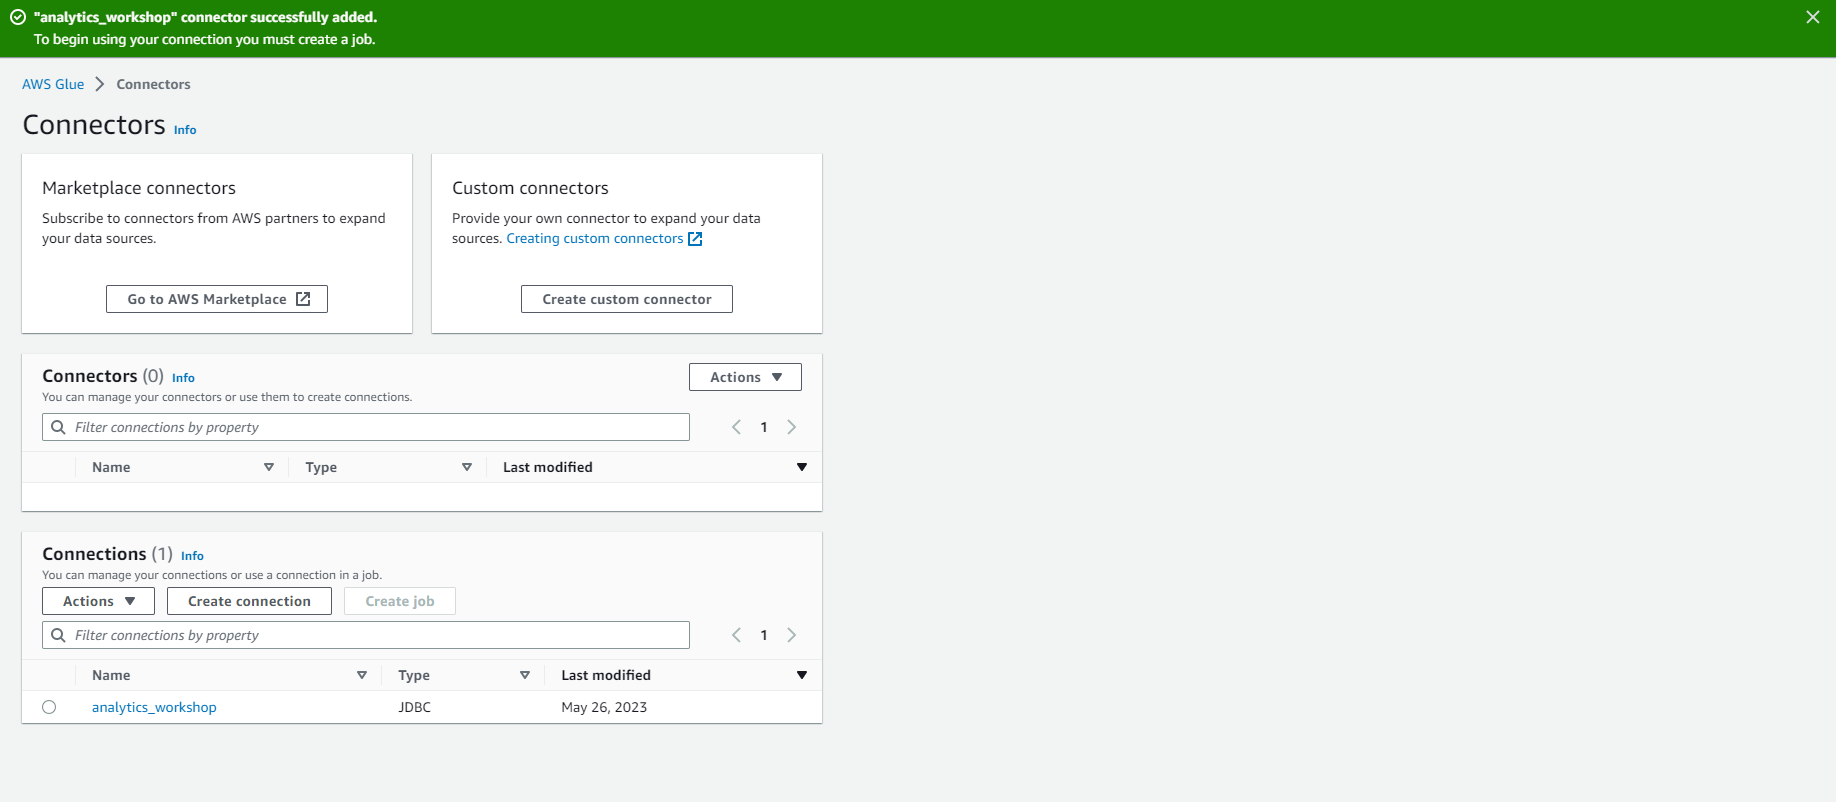
- Select Create connection

- You should now see the analytics_workshop connection in the Connections list.
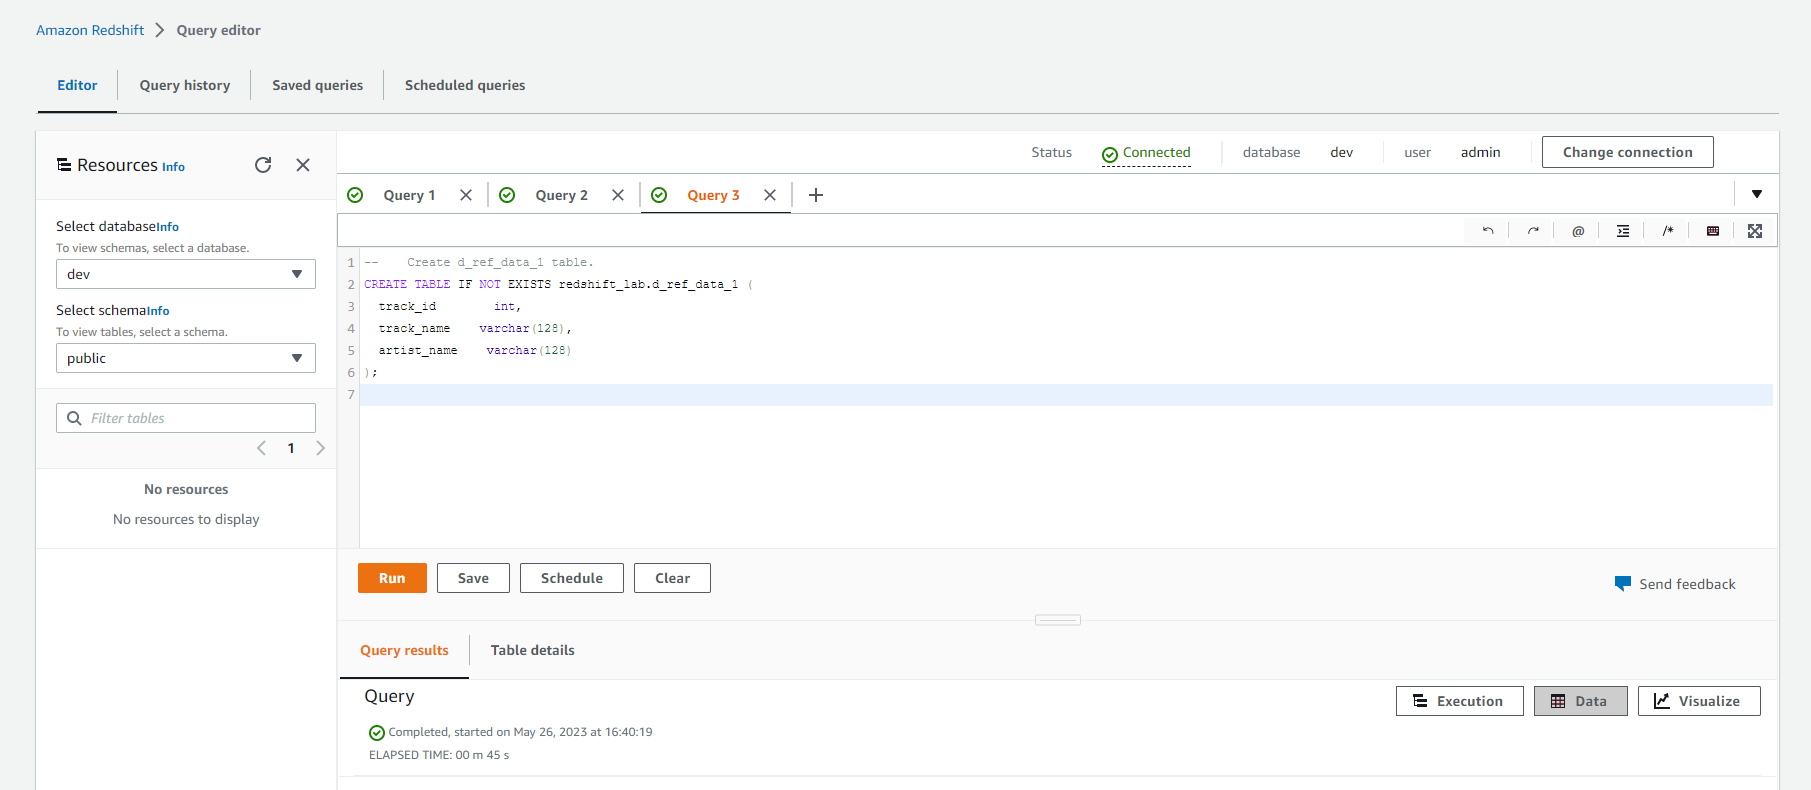
Create schema and redshift tables.
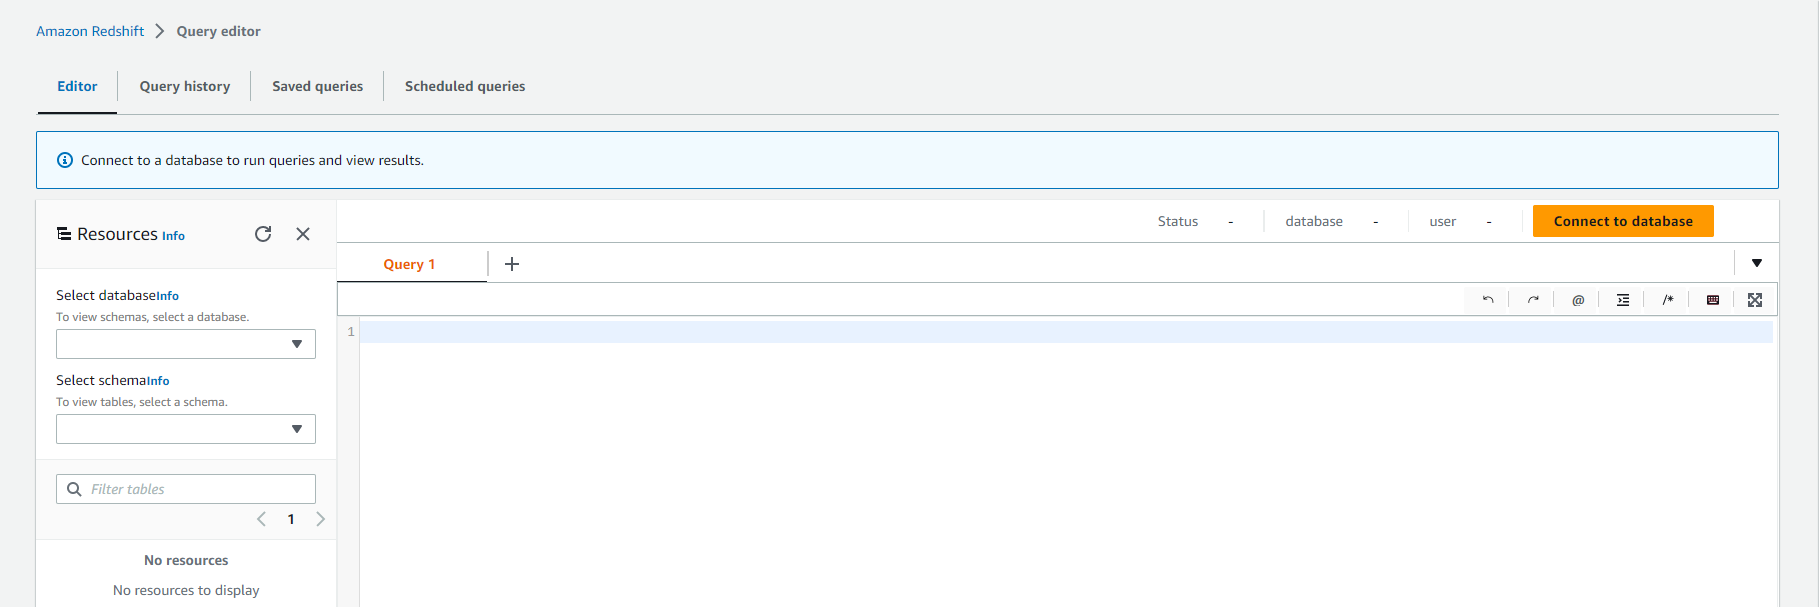
- Access: Redshift Query Editor
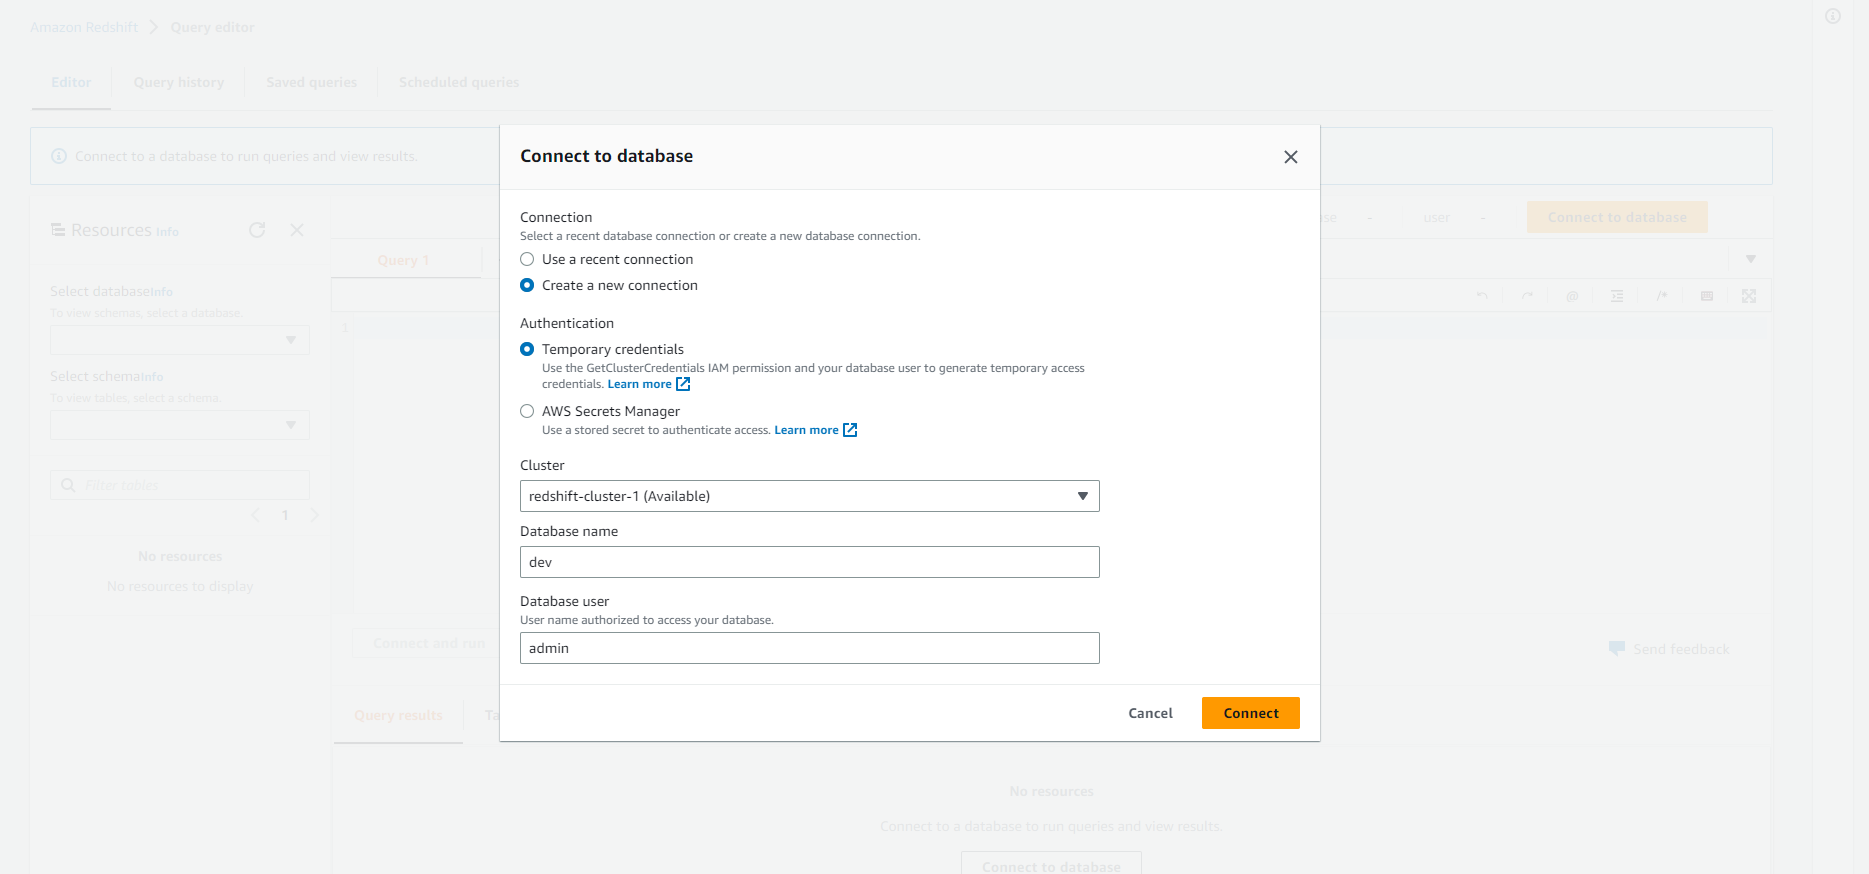
- Click Connect to database
- Connection: Create a new connection
- Authentication: Temporary credentials
- cluster: redshift-cluster-1
- Database name: dev
- Database user: admin
- Click Connect
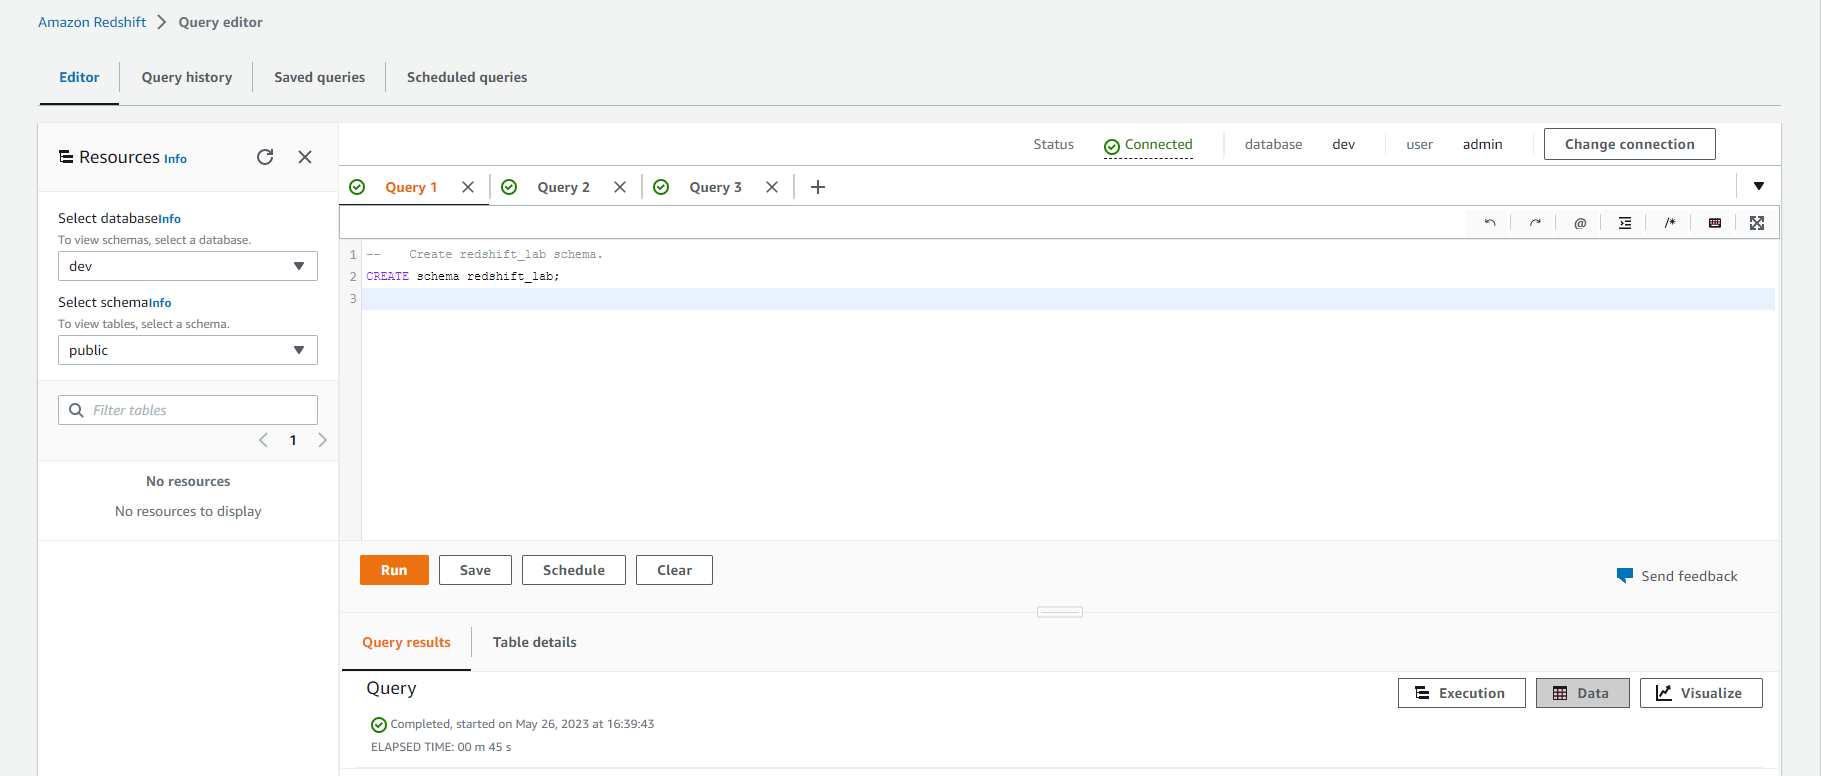
- Execute the below queries to generate schema and tables for raw and reference data.
-- Create redshift_lab schema.
CREATE schema redshift_lab;
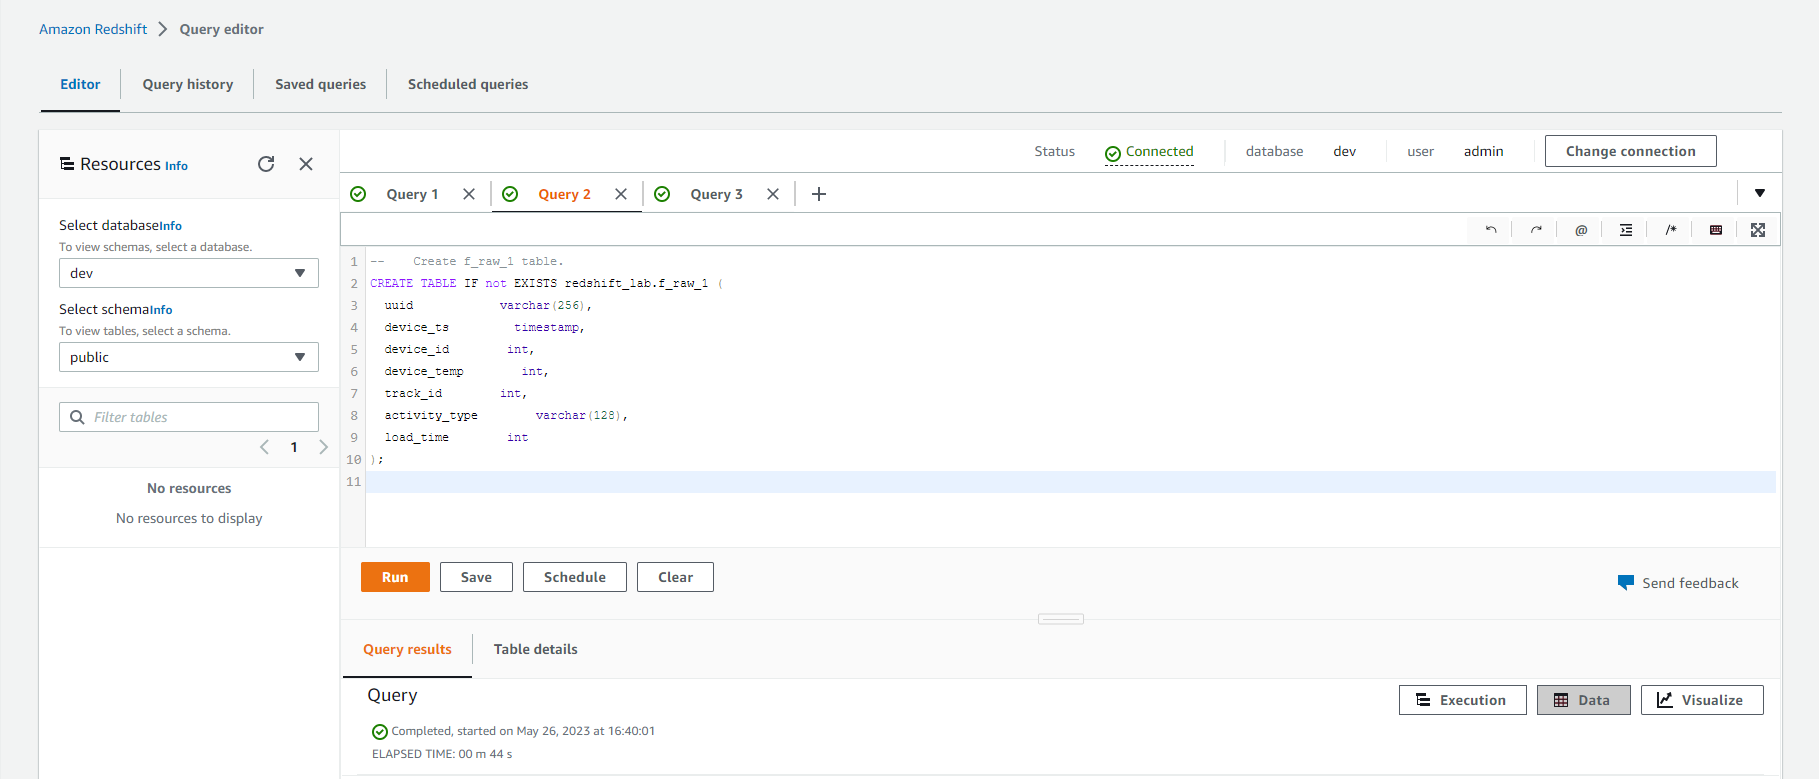
-- Create f_raw_1 table.
CREATE TABLE IF not EXISTS redshift_lab.f_raw_1 (
  uuid varchar(256),
  device_ts timestamp,
  device_id int,
  device_temp int,
  track_id int,
  activity_type varchar(128),
  load_time int
);
-- Create d_ref_data_1 table.
CREATE TABLE IF NOT EXISTS redshift_lab.d_ref_data_1 (
  track_id int,
  track_name varchar(128),
  artist_name varchar(128)
);
Convert and load data into Redshift
- Use Jupyter Notebook in AWS Glue for Interactive ETL Development
- In this step, you will create an AWS Glue job using Jupyter Notebook to interactively develop Glue ETL scripts using PySpark.
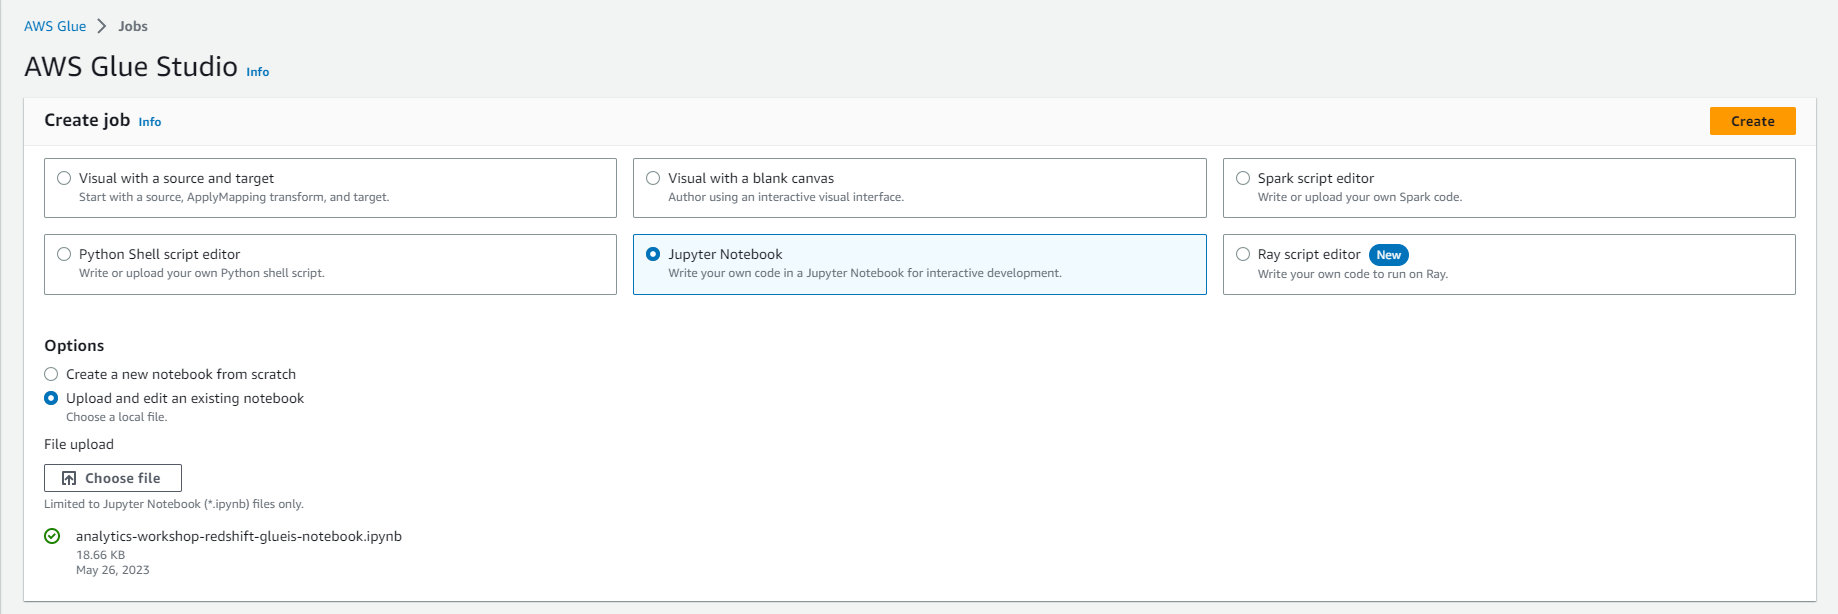
- Download and save this file on your computer: analytics-workshop-redshift-glueis-notebook.ipynb
- Go to: Glue Studio jobs
- Select Jupyter Notebook option
- Select Upload and edit an existing notebook
- Select Choose file
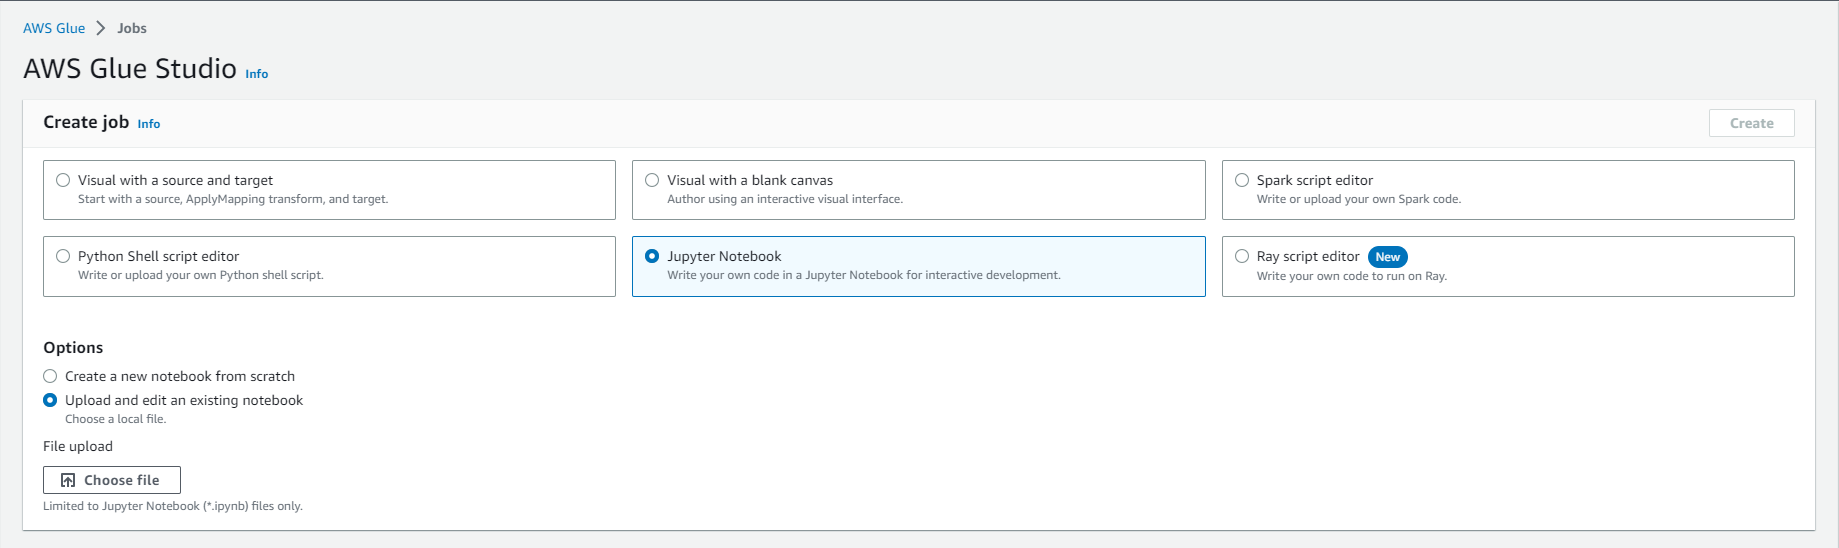
- Browse and upload analytics-workshop-redshift-glueis-notebook.ipynb that you downloaded earlier
- Select Create
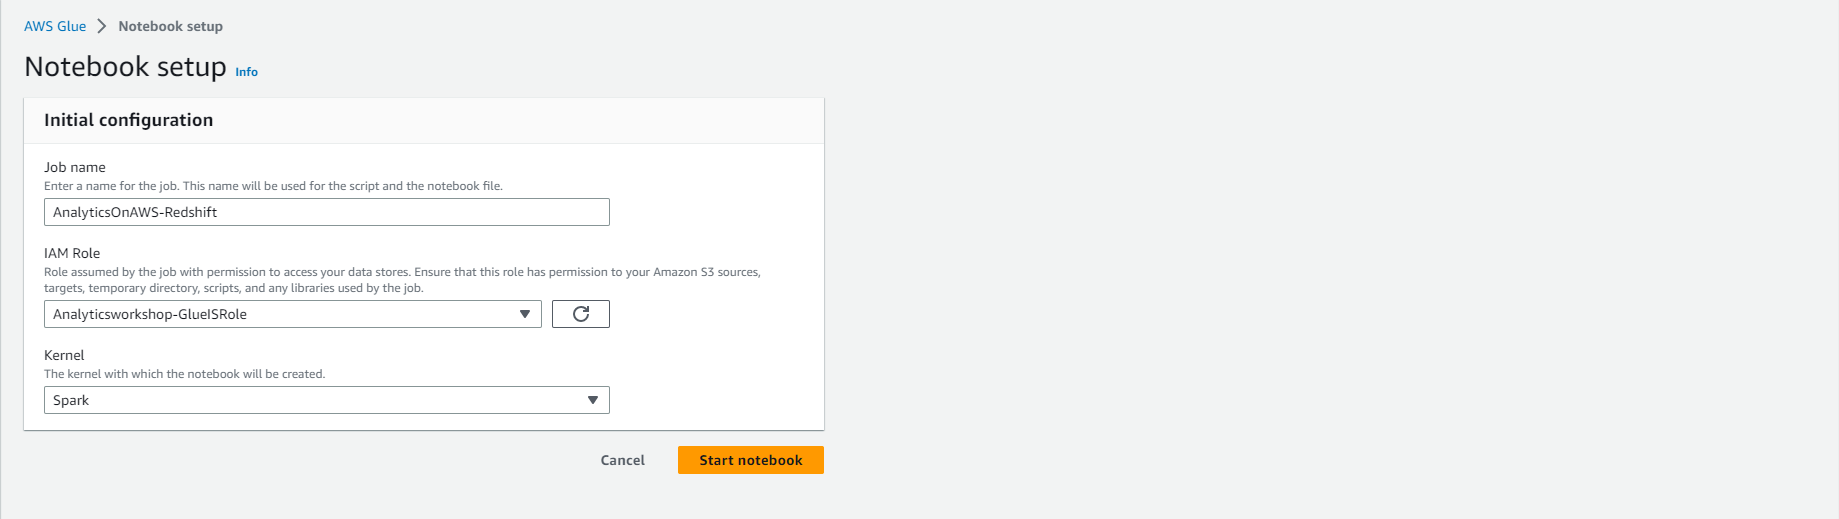
- Under Notebook Setup and Initial Configuration
- Job name: AnalyticsOnAWS-Redshift
- IAM role Analyticsworkshop-GlueISRole
- Leave the default Kernel as Spark
- Click Start notebook
- After the notebook is initialized, follow the instructions in the notebook
- Read and understand the instructions as they explain important Glue concepts
Validate - The converted/processed data has arrived at Redshift.
-
After ETL script runs successfully, open Redshift Query Editor
-
Execute the following queries to check the number of records in the raw data table and the reference table.
select count(1) from redshift_lab.f_raw_1;

select count(1) from redshift_lab.d_ref_data_1;
- Some queries to try
select
  track_name,
  artist_name,
  count(1) frequency
from
  redshift_lab.f_raw_1 fr
inner join
  redshift_lab.d_ref_data_1 drf
on
  fr.track_id = drf.track_id
where
  activity_type = 'Running'
group by
  track_name, artist_name
order by
  frequency desc
limit 10;